| So far I'm happy with the Ceramic Coating. The biggest reason is that when I wash my car I can get 90% of the dirt off with just water. It just make the car easier to clean. The big plus is that water just beads up and flow off like nothing I've seen. Yes dirt will still stick to it, but it takes a lot. For example, the images below I haven't washed it in two week and still it's pretty clean. This includes a recent snow storm and a few hours of making donuts in a near by parking lot. Like I said I'm pretty happy with the coating even if it is a once a year thing or bi-yearly. 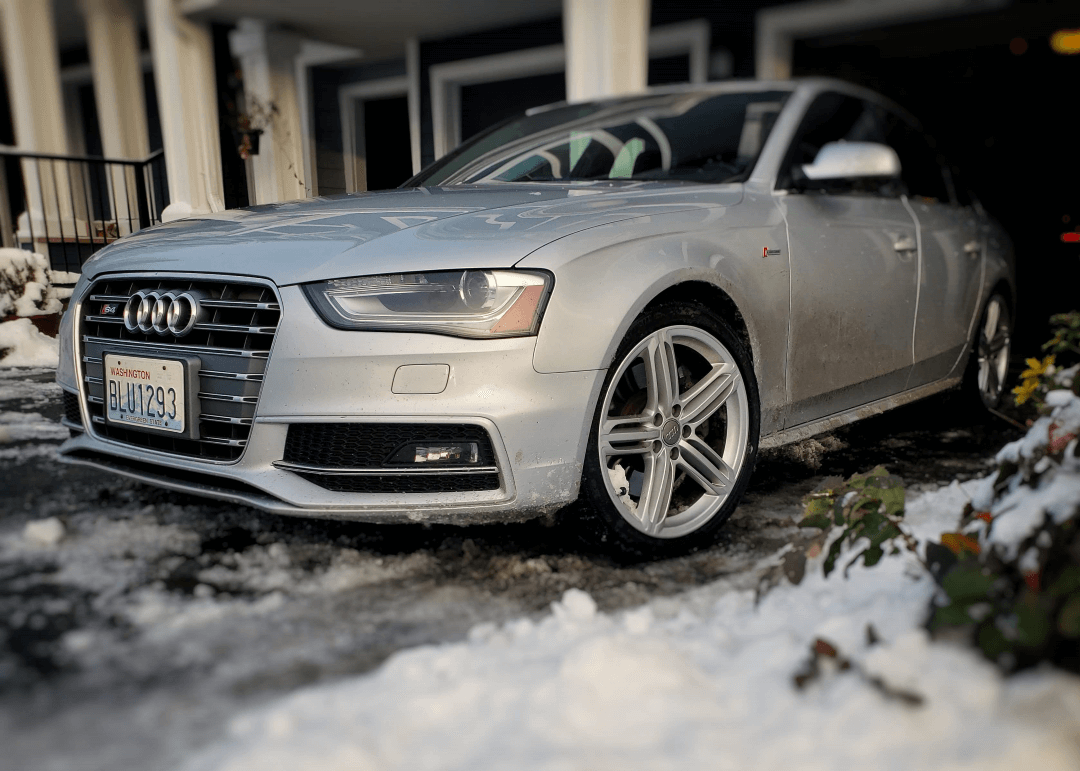  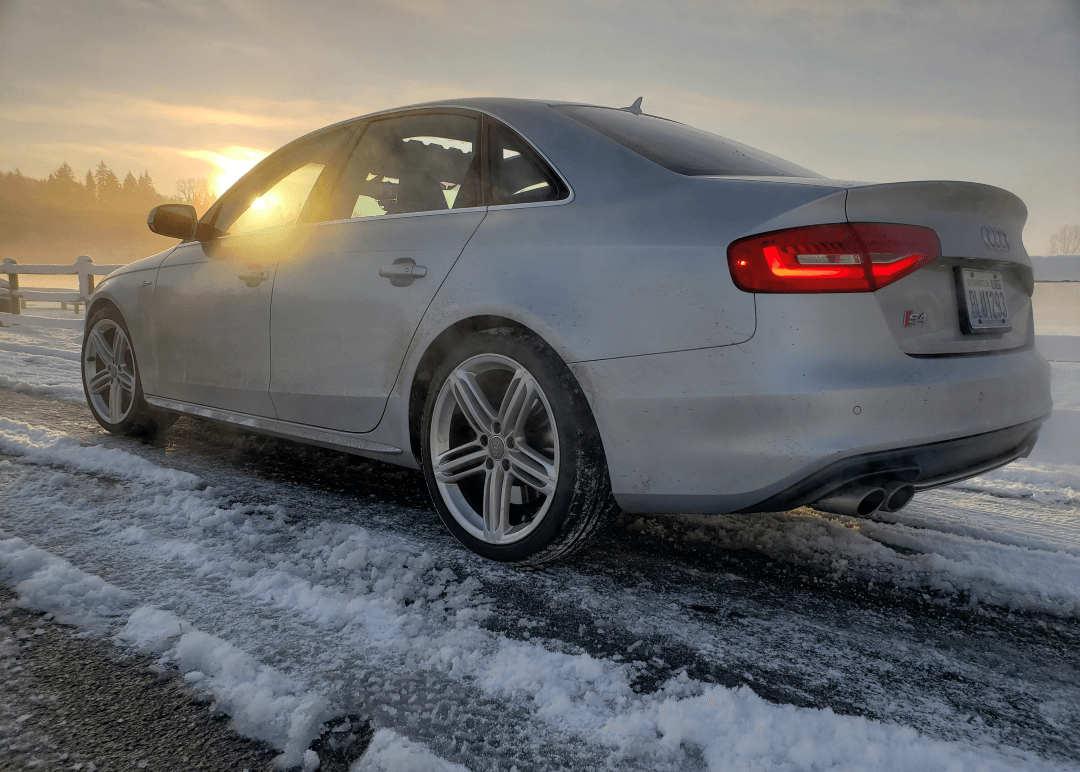 Read more about my Ceramic Coating here: http://www.mys4.org/b85--b5-audi-s4-progress/ceramic-coating-applied-carpro-cquartz-uk-30 Product Link: CarPro Cquartz UK 2.0 - https://amzn.to/31Z6by7 (affiliate link) - Amazon affiliate links were used in this post
0 Comments
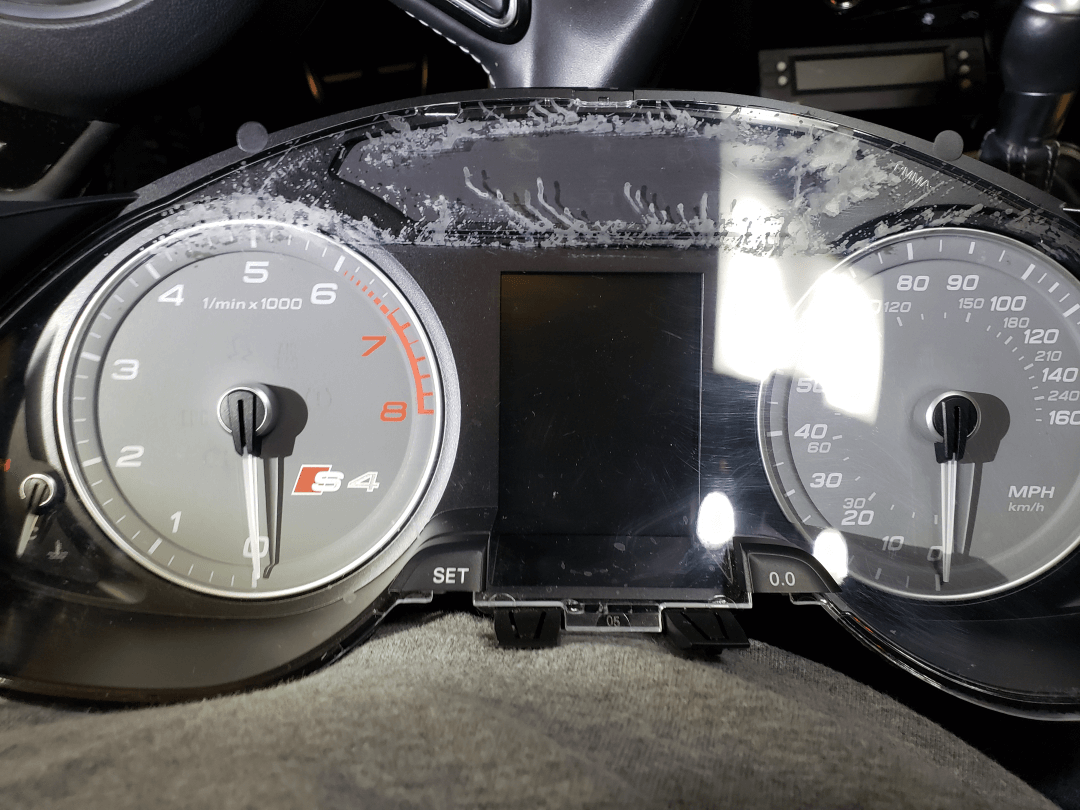
The one thing that has bugged me for a while is my cluster. One of the previous owners spilled something, likely coffee on the cluster and failed to clean it up. Likely they let it bake in the sun so it was game over at that one. I tried to clean it up with no success. I figured it must have gotten in the inside of the plastic lens. So today I decided it was finally time to fix this. I follow some of the instructions and a few videos found in the link below: The trim around cluster is likely the hardest thing to remove. While it not hard I just didn't want to break anything so I took my time. I do recommend a trim removal tool kit like the following below to help:
To clean the cluster I took took the lens off the cluster by unscrewing about 8-10 small torx screws from behind the cluster, and the lens basically snaps off the cluster. What I found after doing this was that the spills was actually on the outside of the lens. I know pretty stupid, but the spill was so etched into the plastic is was hard to tell. Now knowing where to actually clean, I started with windows cleaner and then rubbing alcohol, but was not making any progress. I had some heavy duty glass cleaner so I figured I would give it a try:
I started in a small area with this stuff as it was pretty powerful. I quickly discovered this stuff worked just like it does on glass. One tip I would offer is to wear gloves, and also use either a foam pad or microfiber towel to start your polishing. After about 15 mins of polishing, 99% of the spill was finally removed. I then went over the cluster with a fine swirl remover polish to removal any swirls this glass cleaner may have introduced. I only spent about 5 mins on this as this plastic lens is pretty soft, so didn't want to completely remove layers of plastic. I finished the polishing up with some more rubbing alcohol to clean down the surface once more and prep it for my next step. My last step was to apply a layer of paint sealant to offer some UV protection so the plastic would not yellow like some plastic headlights do. Not to mention this would help hide any remaining swirl marks. I did a few coats of this stuff as I had it in the garage:
And as you can see below, this turned out pretty good. - Amazon affiliate links were used in this post
My Prep Work Process:
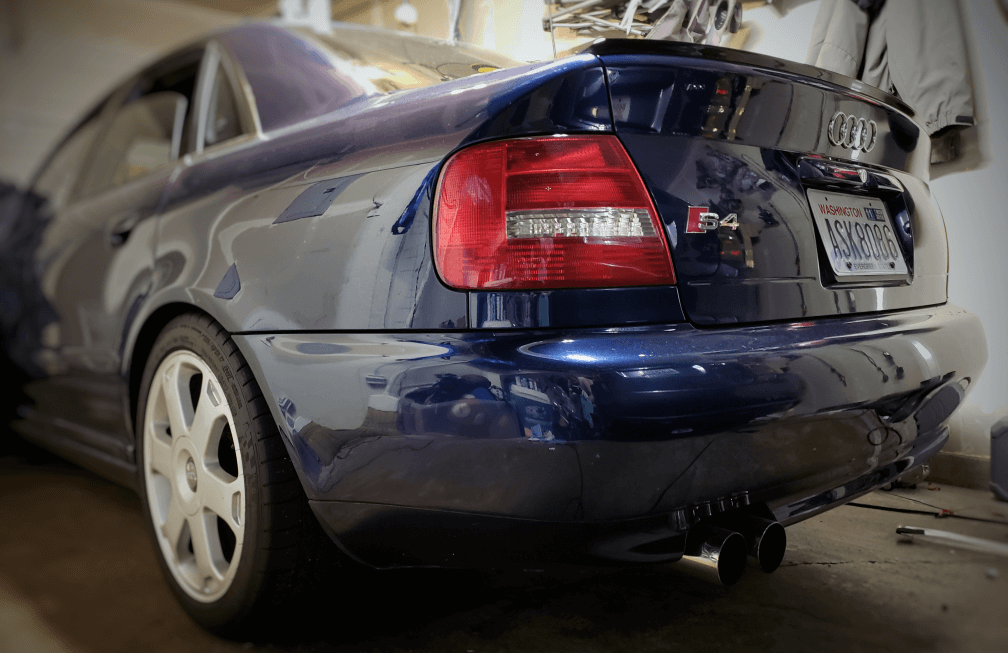
As for my prep work before I applied the ceramic coating, I washed the S4 like normal with few ounces of "SuperClean" in the soap to help strip all the grease, wax, and dirt away. From that point on I opted out of the typically clay bar for a no touch chemical clay bar process. Why? Well... clay bars are great for really really contaminated cars, my car was already detailed back a few months back when I got the car, and I garage it at home and at work keep it away from all trees. Yes, I know you can still pick up a lot of crap just from driving, but I don't live in area with tons of bugs and I haven't been on any long road trips. Not to mention I really wanted to see if a chemical treatment was just as good if not better than a clay bar. Once the wash was completed, I air dried it with electric air blower (I love this thing) and started the first decontamination treatment with CarPro Iron X (affiliate link). Decontamination Stage 1: Basically you spray CarPro Iron X (affiliate link) everywhere on your car (avoid your brake rotors or any exposed metal) and let it sit for 5-10mins to react/breakdown any iron contaminant. I think I had it on there for maybe 15min. Minus the bad chemical smell this give off, it is pretty cool how it turns purple (dark red) when the reaction with iron starts. I didn't see a lot of reaction on my car so that appeared to be good sign my car was already in good shape. That said, I'm not sure if this is a chemical trick or not, so I can't really say for certain how well this work. If you are looking for a warm fuzzy feeling, this might help with that. Decontamination Stage 2: This next step I knew was really where things would get removed. Just like the Iron X, I sprayed on the CarPro Tar X everywhere on my car's surface and allowed it to sit for about 10mins. Luckily this stuff smells pretty good (like Oranges) so no issues here. After about 10mins I went over it again with a wash meet and sprayed a little more Tar X to make sure I got all areas of the car and to help loosen up anything that the Tar X already loosened up. Finally I finished it up with a nice long water raise with my pressure washer. After air drying my car, it was butter smooth. This Tar X really did do a good time to remove all the crap. Polish Time: Nothing special here just just a decent polish to help lessen any swirl marks or light scratching. I used a TORQX Dual Action Polisher (affiliate link) with the red ultra light cutting pad. IPA Wipe (Isopropyl Alcohol): This is a new step for me but it totally makes sense. If you ever do any type of gluing or applying tape, you know the first step is to clean there surface with Isopropyl Alcohol. As we want the ceramic coating to bond as best as possible to the surface you need this wipe down to get it as perfectly clean as possible. Some people at this point will go back and do another wash, but a good IPA is just as good and faster in my opinion. I went with a 9:1 (water to 91% Isopropyl Alcohol) ratio and wiped down all of my car's surface. Ceramic Application: I won't go into too much depth here as there is a lot of videos and sites that go over the steps, but in summary apply a little of the liquid ceramic coating on to the application pad and work on small 1 to 2ft areas at a time. This was likely the best directions I found: I did one coat and waited 24 hrs to do the second coat. I will say that as my garage temps were around 50-55F degree the coating didn't "flash" dry that quickly. Like a good thing for a first time attempt. It would take about 1-2mins before it would give a slight rainbow, meaning it was time to wipe off the coating. Likely in the future I would do this more in early summer later or late spring so that the temps were between 60-70F degrees to help speed up the process. Results & Thoughts: While this stuff says you can put it on nearly any surface, I would avoid glass. Nearly all of my windows had hazing issues after another 2 days of curing. And yes I made sure to wipe it off good before it flashed. I can only guess that I didn't clean my windows good enough or something. I have some great glass cleaner/polisher called "Driven Extreme Duty Glass Cleaner" (affiliate link) that I completely forgot to use. Luckily it worked great to remove the ceramic coating from the glass. I did leave it on my headlights as there was no issues there. As for the rest of my car, I couldn't really say if this looks better than a traditional wax or synthetic sealant as I've never done that on this car. or this color before. Per my research it takes about 30 days for the ceramic coating to fully cure and become it's glossiest... so we will have to wait and see. I'll post some picture and video in a few weeks so we have a record of what it looks like. I will say this is fair more expensive than a traditional wax, but it makes sense as this is marketed to last 2 years. Only time will tell. - Amazon affiliate links were used in this post
I'm really not going to go over the steps on how to install new HID bulbs in a B8.5 S4 as there is many Youtube videos out there to cover that. I will let you know that you will need to remove the Air intake box on the passenger side, so plan a head on that. I will warn you these are 4200k color so they are white with a hint of yellow. For those of you that want the pure white, well these aren't going to be your bulb. I like them because simply because this color works better for all weather situation. 5500K and higher bulbs have a hard time illuminating wet roads like what we experience in the Pacific Northwest, so the 4200k is the ideal color.
In summary way brighter, and I'm happy I got them. Sorry pictures won't do justice so you will just have to take my word for it. - Amazon affiliate links were used in this post Wait what? Let me explain. So I was looking at the old supercharger pulley and took some measurements and it is nearly same size as the pulley I put on. (Little over 57.5-57.7mm depending on where I measure it). I know this is smaller than stock so this means one of the previous owners had a stage 2 tune on this car. Also when I went to stage 1 I noticed a major hit in my MPG as my car was likely running too lean as the supercharge was spinning faster that stock and blowing the air to fuel ratio out of whack. I think the previous owner likely flashed it back to stock as the stock tune would be able adjust for the different boost from the supercharger, it just the stage 1 was not designed for the pulley to be there so that likely where the problem is. I'm going to give the stage 2 tune a few tank fulls to see if now my MPG comes back up.
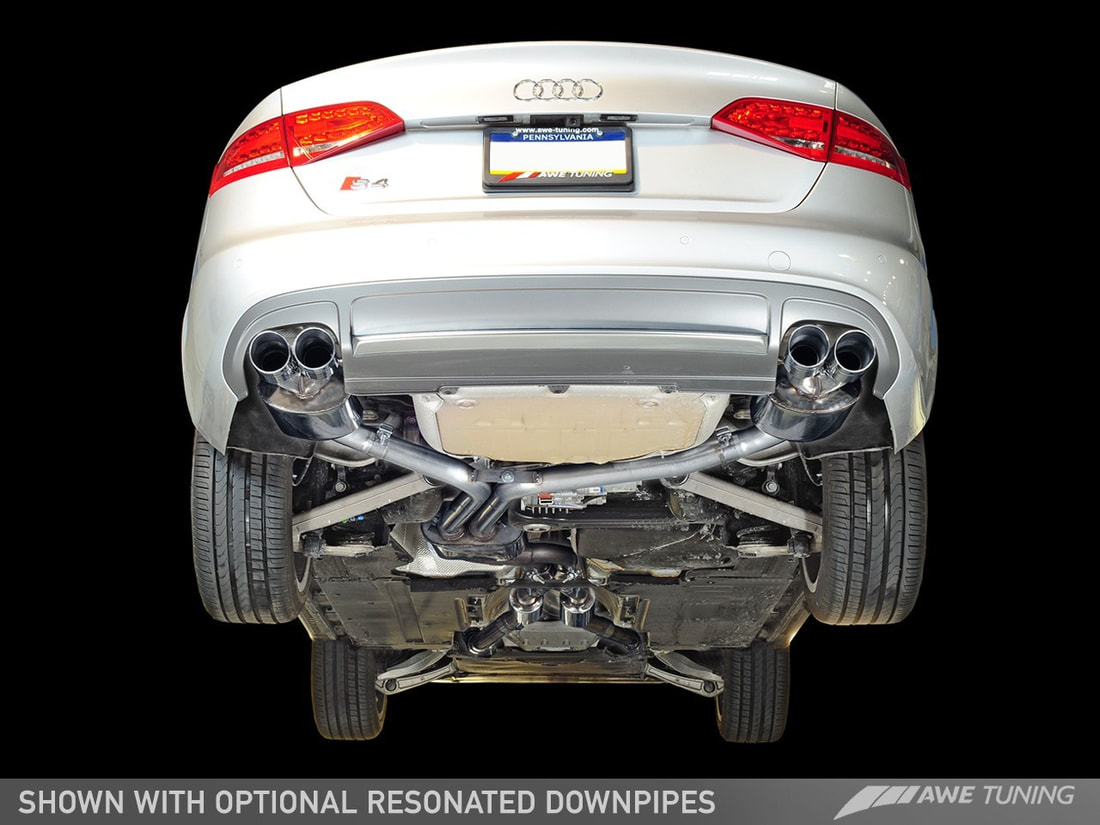
That all said, I did look over my install pictures and the car itself and sadly I can't find any other major upgrades that I should be aware. I was really hoping to find the crank pulley and cooling upgraded, but it wasn't. The real question is what tune was on this car before? I've emailed all the major tuner and gave them my VIN to see I can find who it was. Kind of a shot in the dark if any of them reply. As for the EPL Stage 2 single pulley tune, it certainly has a lot more low in torque and generally more power along the full range. It is simply stupid easy to break loose my all season tires on a slightly wet road with traction control set to off. I'm ditching these tires went spring comes as I'm getting winter tires install this weekend and hope to run summer tires next post winter. As for the tune I'm happy with it. I've very interested to see if my MPG improve now that everything is back in sync. Only time will tell... I couldn't pass on a Black Friday sale with EPL so I decided it was time to upgrade to Stage 2. There are many videos and guides out there, so it's kind of hard to screw it up. It took me about 4-5 hours to complete, but I was going super slow to make sure I didn't break anything, and or lose any bolts. The most time consuming part is just getting the car into "Service Position". After that point it was about 5mins to get the supercharger pulley removed, using a proper pulley puller tool. I had the new pulley heated in my oven for about a hour at 400F but sadly that was not enough as the pulley would not go on. So I did 500F for 20mins and the pulley went on like a glove. I used a mini blower I have for blowing off water from my car and 10mins later it was cool enough to the touch to install the belt. From there put everything back in reverse order. And Another few mins to flash the EPL Stage 2 tune and I was on my way for my test drive. About 10 mins into my drive I heard a horrible flapping slapping noise. Crap, I was so excited to drive I didn't bring any tool and immediately thought my belt snapped. I pulled over to take a look and found no issues... the belt was fine. So I continued on my drive heading back home and the sound did it again.... At that point I remember one thing I forgot to snap back in place and it was the garage door homelink transmitter between the grill and heat exchanger. It was basically flapping in the wind at certain speeds. Luckily all was ok and it still functions... but it sure did scare the crap out of me. I'll give it a week to allow everything to adapt, before I push it. I hope to give it a review in the coming weeks.  This weekend, I replaced my stock fog lamps as they were pitted like crazy. I found a pair of new Depo's on eBay for a little over $100. To prevent this pitting from happening again I went with Lamni-x and got a some film with a slight tint on it. I wet applied the Lamni-x with "Rapid Tac" which is a great spray to use for vinyl or other wet applications. It made it some much easier to align the Lamni-x as it only cover the visiable part of the fog lamp when the cover/grill is back over it. While I was working on my fog lamps I updated to 3000k HID's. I do miss my retrofit projected fog I had in my B5 S4 as there was zero glare with them. As my current B8.5 S4 is using a reflective housing, glare is a problem. Typically what I will do is measure from the ground to the top of the fog lamp and then put a line of tape on my garage door at the same height (showing below). I try to get the hot spot of the beam to be slightly below the line to minimize glare as the beam is angled down.  I do recommend that if you want HID's in your fogs, it's best to turn off the "corning light" function in VCDS (VagCom) or OBDEleven (affiliate link). The corning light will turn on the fog light for which ever side you are turning too at low speeds like in a parking lot for example. This is just not good for HID as you don't want to turn them on and off in short intervals. Plus there is a warm up period of HID bulbs, a quick on and off is just damaging them. So far I'm pretty happy with the setup. The fogs are slightly less noticeable when off, but when they are on, the light is perfect for our often rainy Seattle roads. I'm be looking for a different setup of HID bulbs as the color is a warm yellow, but not the golden yellow I am after. We will see... - Amazon affiliate links were used in this post Following some of the suggestions found on the following thread, I decided to modify my existing stock exhaust to allow it to sing a better tune. https://www.audizine.com/forum/showthread.php/406948-Exhaust-Mod-Resonator-replaced-w-X-Pipe-(video) So, I had a Magnaflow 11385 installed where the baby resonators are located, and straight piping where the mid muffler. 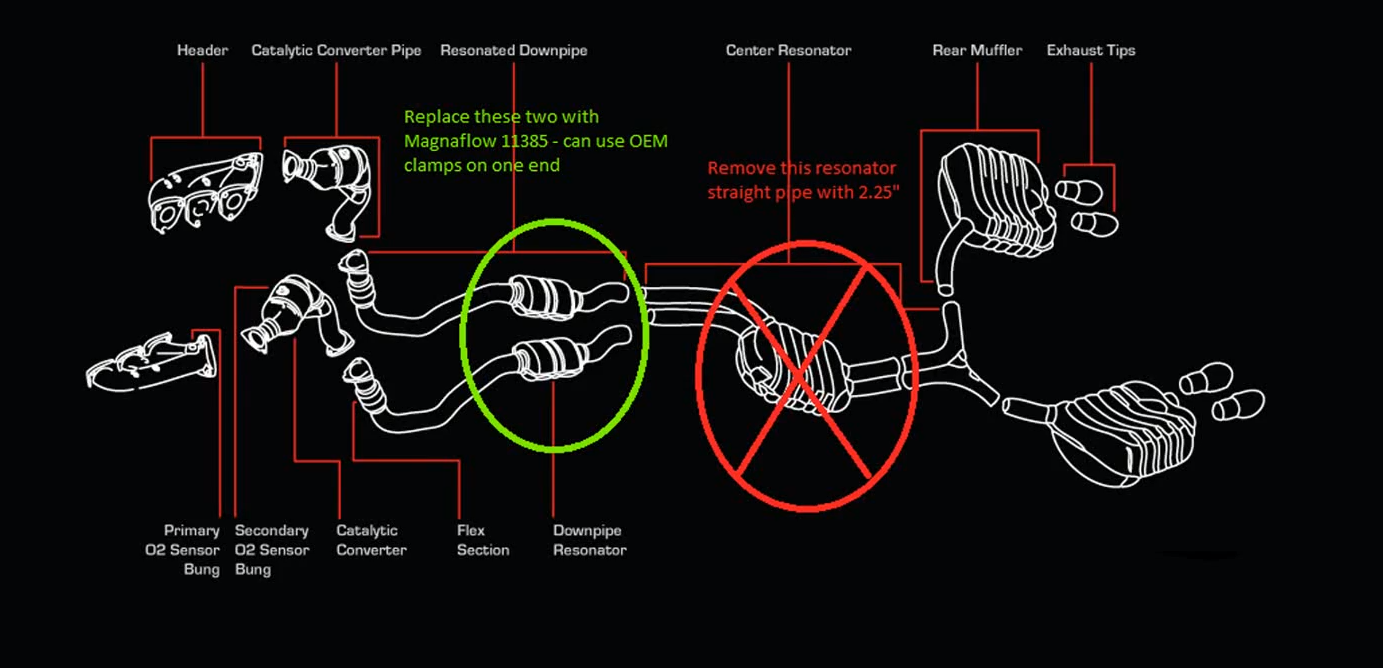 Source: Youtube (T Hunt) Source: Youtube (T Hunt) And here is a drive by, drive away, inside, and some reving all in one: As for my initial thoughts, it is near stock like quiet when cruising at 60 mph, no drone at all. Once you open it up it has a prrr like sound very familiar to a VR6 or VW R32 with out the the lower tones. The best part, if you drive it gently, it really is not much louder than stock. Not to mention from the outside, it still looks 100% stock. In typical Audi fashion, it didn't take long for my first problem to come up. I noticed on our weekly trip to Costco that the A/C wasn't kicking on. I'm so glad I got the OBDEleven (affiliate link) scanner as I was able to find out the problem while waiting in the Costco gas line. If you don't have a OBDEleven, it is worth it. You get everything the VCDS (VagCom) has, but in a easy format. The faults I got were 00457 & 00256: 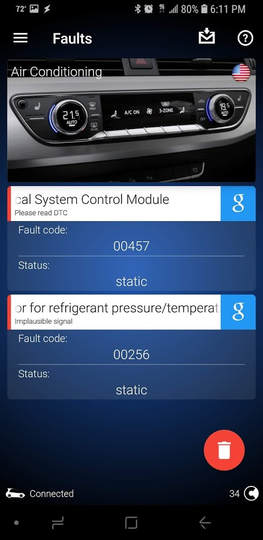 The part I needed was an A/C Pressure Switch (Part Number: 4H0959126B)
The install was super easy. Just remove the black plastic tray that sits over the top of the radiator and A/C condenser. This is the same tray/cover that is in between both headlights in the engine bay. Next, look down just behind the front grill on the driver side and you should see this: 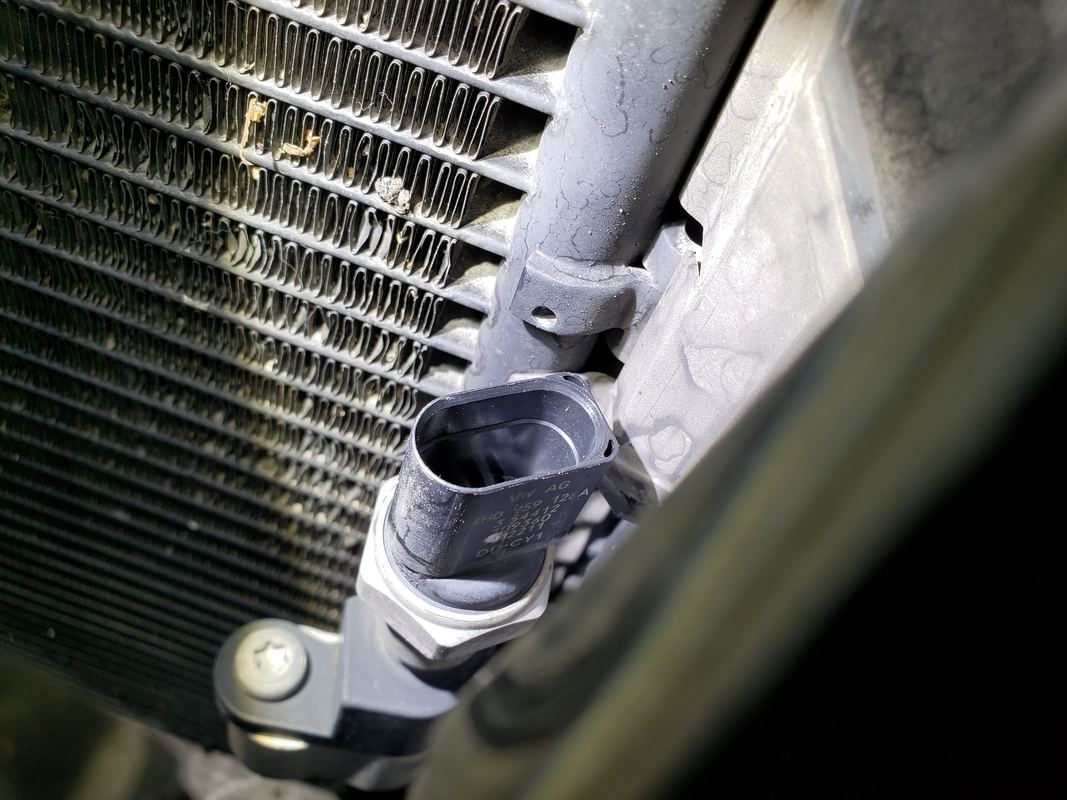 You do need a 24mm wrench or super deep socket. Simply remove it counter clock wise. If you are using a socket you will need to unplug the electrical connector. Once it is nearly off you should here a small "phsss" for a second. That is just a small amount of refrigerant coming out, but it is ok. Now if you hear a ton coming out more than a few seconds, well, you just lost your refrigerant and you got another valve that needs to be replaced (sorry).
At this point, just go in reverse order and install the new switch. Done. Enjoy have working A/C! As I had no idea when they were last replaced I figure it would be a good time. As well after chatting with EPL after everything was flashed it was recommended to replace the spark plugs. I went with the NGK PFR8S8EG gapped to 0.026" per their recommendation.
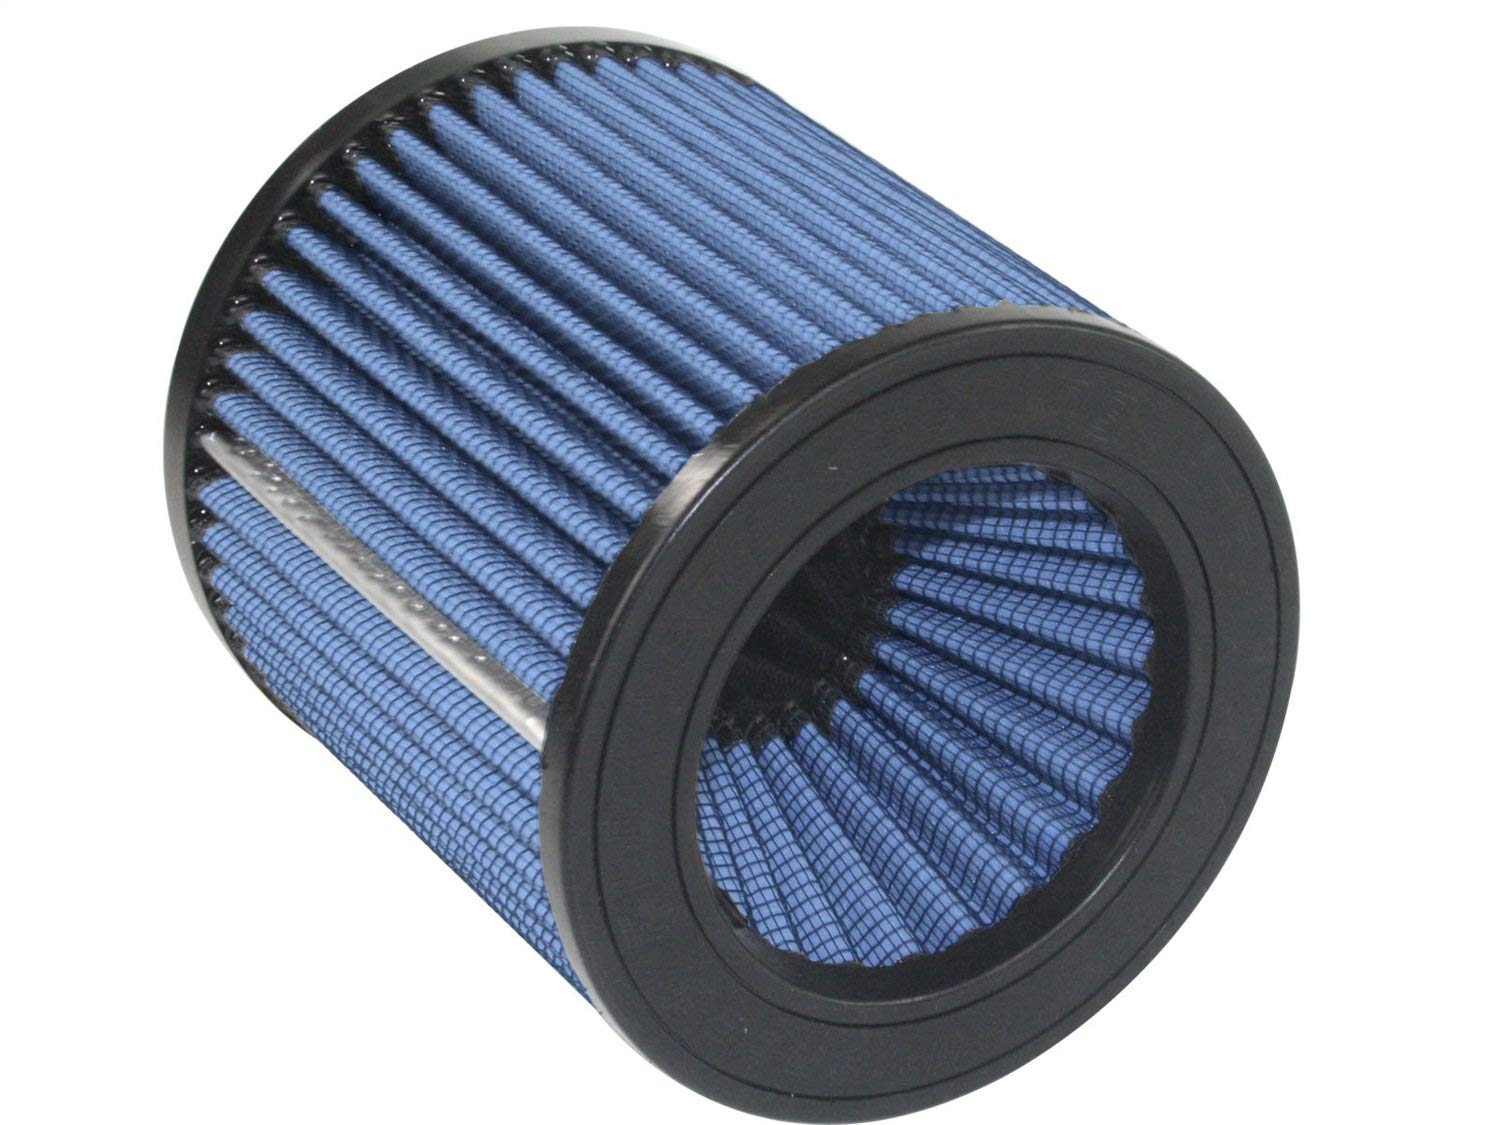
The install was very similar to my previous B5 S4. I had to move the coolant reservoir and stock air box out of the way to get to the coils, but wow are the coils a pain in the butt to pry out. I thought for sure I was going to break them trying to get them out. With the old plugs out they actually weren't in too bad of shape, but as I was already here I replaced them anyway. Nothing too exciting with this post, but it is one less item to replace. Honestly, I'm not sure why so many people are a fan of this filter, but as it is a little cheaper than a K&N filter (at the time), I figure I would give it a try. Installation went smooth, but I don't really feel a difference. It certainly makes the supercharger even louder. So I'm happy with that.
Amazon will say this filter doesn't fit, but it does. Below is the link: https://amzn.to/2EJBWPH - Amazon affiliate links were used in this post Stage 1 EPL engine tune and DSG tune has been successfully flashed today. EPL has awesome services, so I highly recommend them. The DSG feel so much snappier, as for the engine tune, the S4 is still going through the adaption phase so I'm not going to judge just get. As well EPL suggested I get some new plugs so I got those on order. Next, I got my ECS Tuning Carbon Fiber Intake boot/pipe installed. This is connected to to my ported air box so it is not a true open air intake. I love the look of that carbon fiber in the engine bay. I had my daughter record this video so I apologize for the shake, I scared her a few times while revving it. From within the cabin the the supercharge whine is noticeable, but not over the top. I've heard that any new intake takes a few weeks for the sound to get louder so we will see how loud it gets. If there is anything I am really missing right now is my exhaust from my old B5 S4. I don't think it was the best sounding exhaust, but it was way better than stock. Loud enough to hear the car, but no drone, and did not annoy the neighbors.
This B8 S4 is stupid quiet and it takes the fun out of switching it in manual mode as you can't tell when to shift unless you are watching the RPM's. So... I know the AWE Touring kit is highly recommended, but good lord, $2k is pricey. Should I save up or go custom? Comment and let me know. It is disappointing how much Audi muffled the supercharger.... so, a ECS Carbon Fiber intake boot is on the way to fix that problem. I've already ported the air box. I can't feel any difference, nor do I hear one, but we will see. 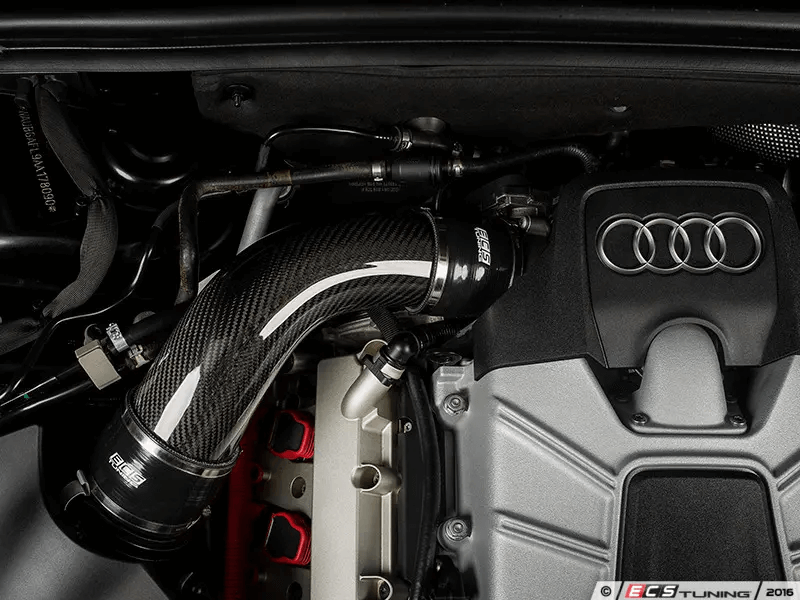 Image source: ECS Tuning (link) Next, EPL (European Performance Labs) was kind enough to extend their "Back to School" sale for me and I have a Stage 1 and TCU (aka DSG) tune in the mail. I'm super excited to feel the difference. More updates coming this weekend! From my 97 VW Jetta VR6, to 2001 B5 S4, and now to my 2013 B8 S4 the first thing I do is always port out my stock air box. It seem like all newer cars the air box gets bigger but the intake to allow the air into the box gets smaller. In any case I cut out about 3-4 square inches of the box on the back passenger side of the box. Also on the front side I added about 20 or so 1/4 inch wide holes. While I was in here I check the air filter but it looks like the dealer I bought it from installed as new one as it was extremely clean.
Any difference in power? No not really, but I was mainly doing this to increase the sound of the super charger as this was recommend. I can hear the super charger ever so slightly now, I still need to get a new intake boot to really increase the the sound. Just got it today.... more pics and details to come... 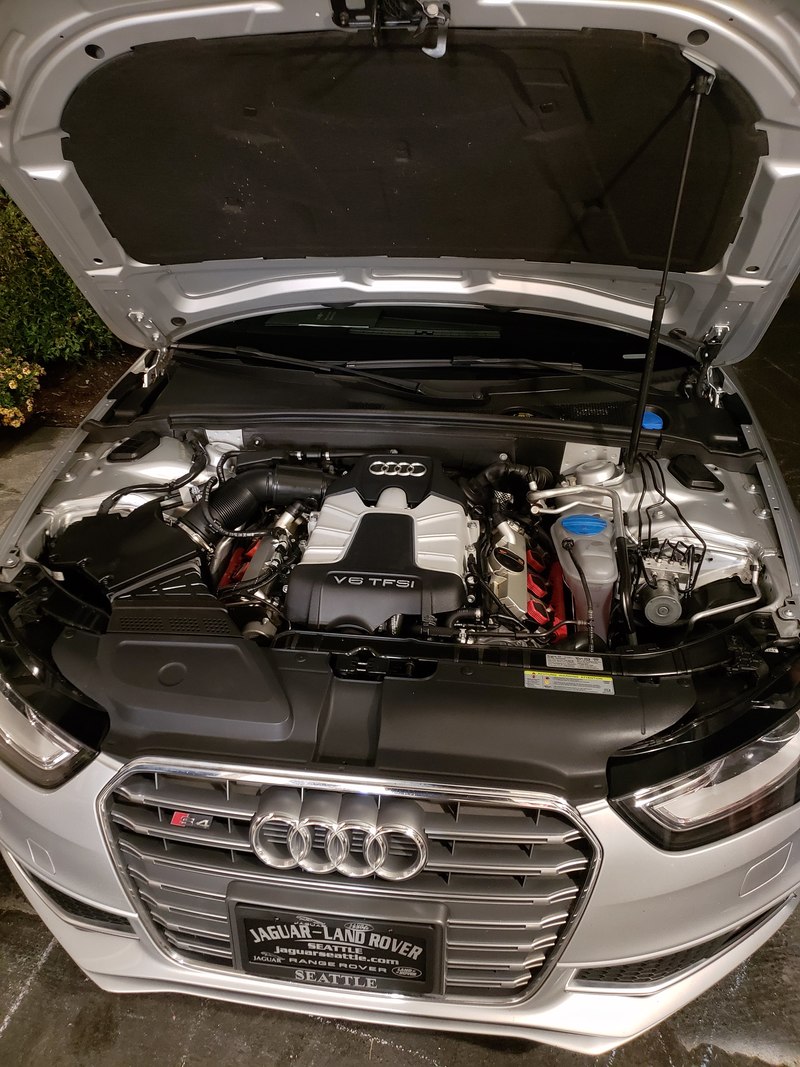  Well my B5 S4 was sold tonight, so the search for a b8.5 S4 is in full swing. Time to put on my negotiator hat.
Well, I'm ready for a upgrade and have my heart set on a b8.5 S4, and since I only have a two car garage and my wife won't park outside... the B5 S4 is going up for sale.
You can find my post on Craigslist here: https://seattle.craigslist.org/est/cto/d/2001-audi-s4-stage-1/6685411661.html I'm in no rush to sell, but if you are interested let me know. Well the time has come for me to look for something a little newer. I love my B5 S4 but it is not the best for commuting. So yes, I'm sadly looking for an automatic. Seattle traffic simply sucks, and I'm getting too old and lazy to deal with it. And to top it off I did test drive a B8.5 S4 and that 7 speed DSG, all I can say is wow! So smooth!
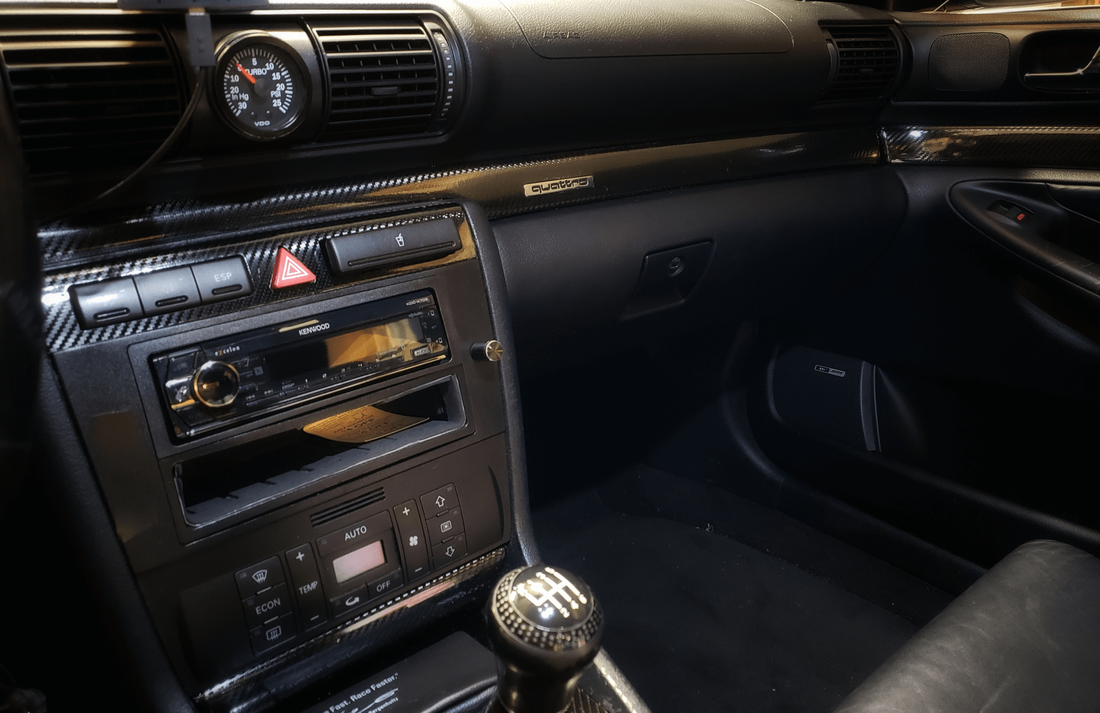
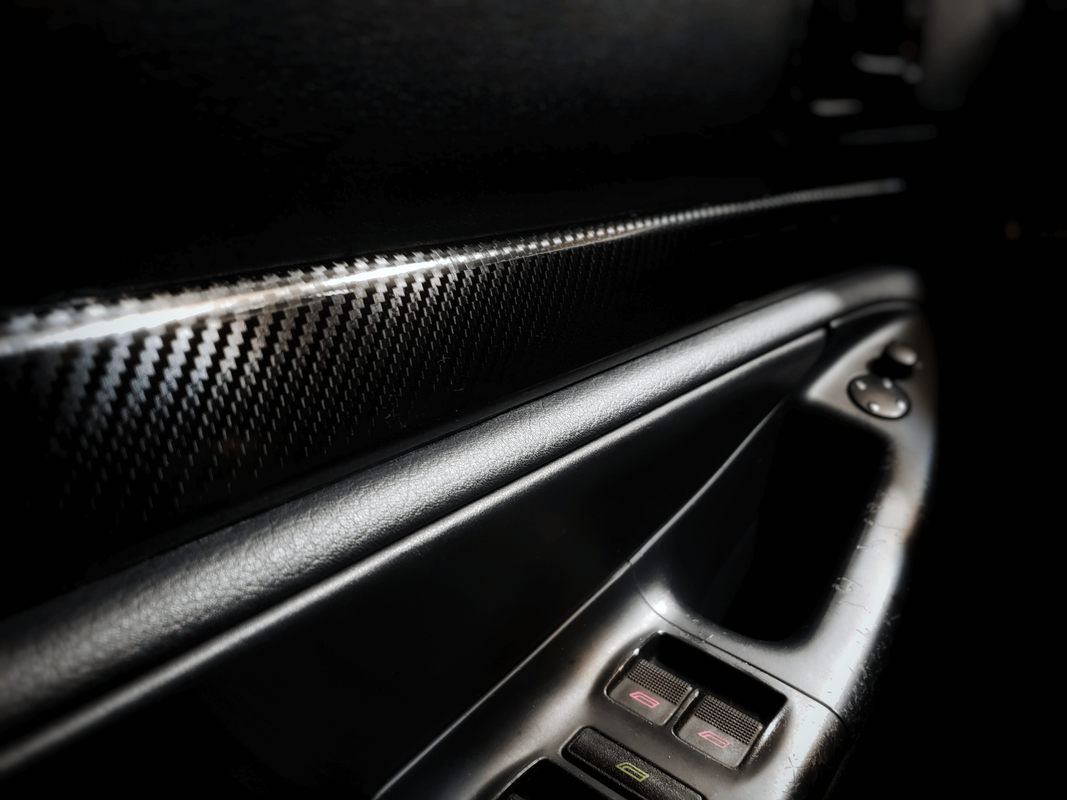
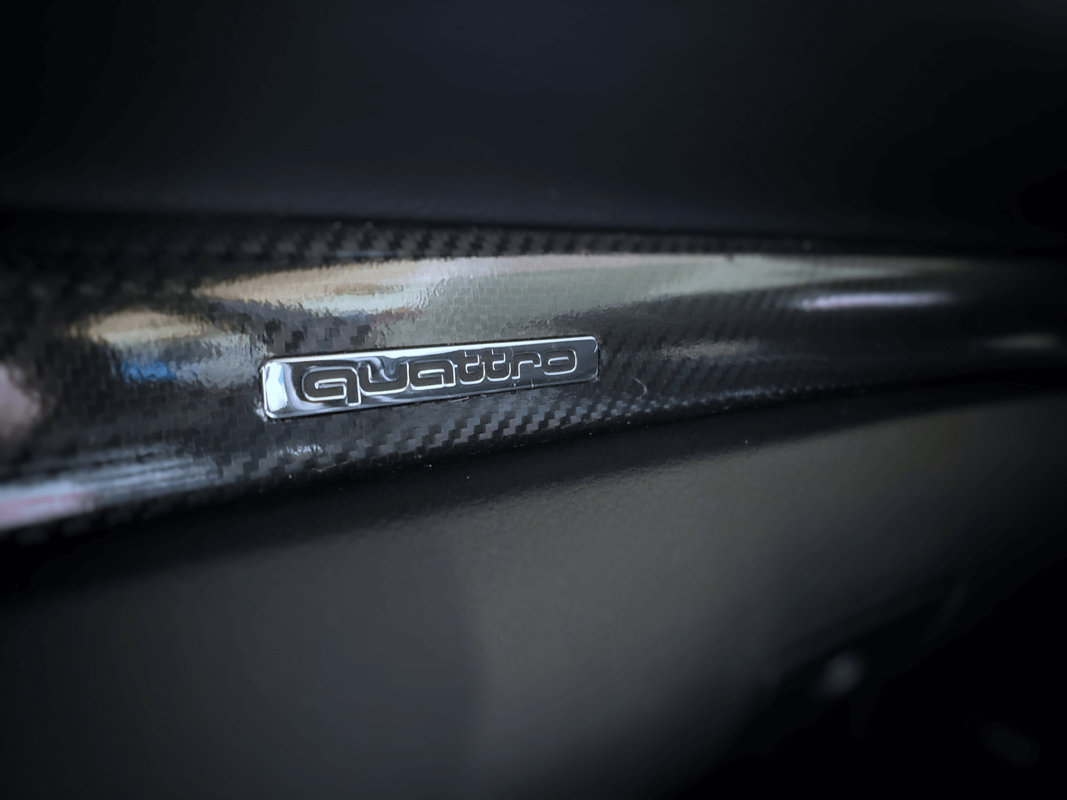
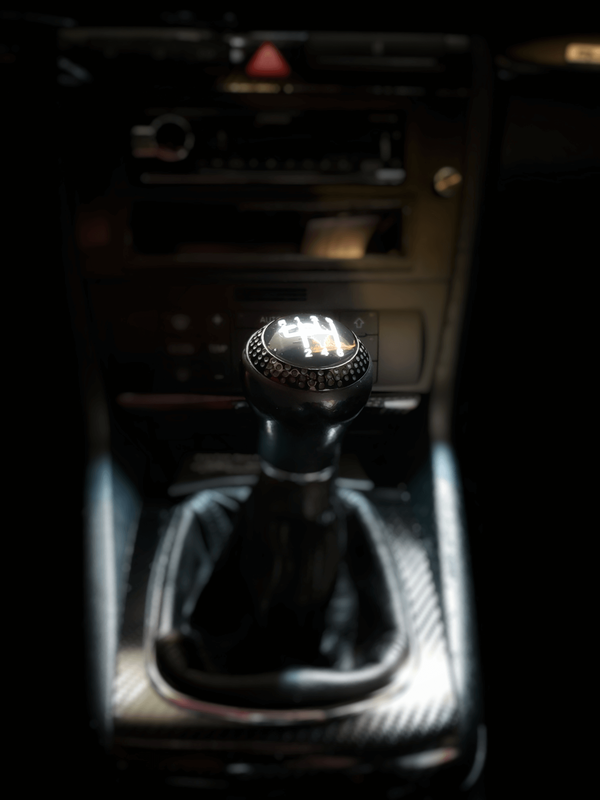
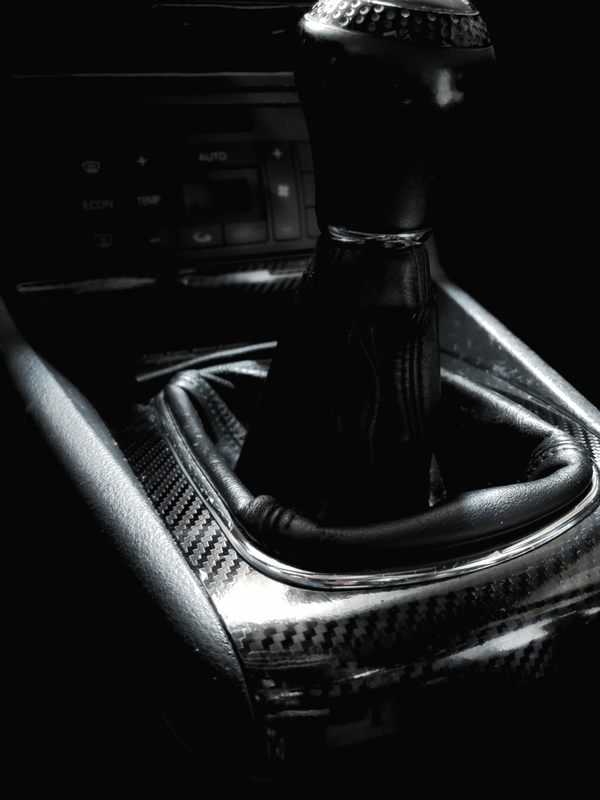
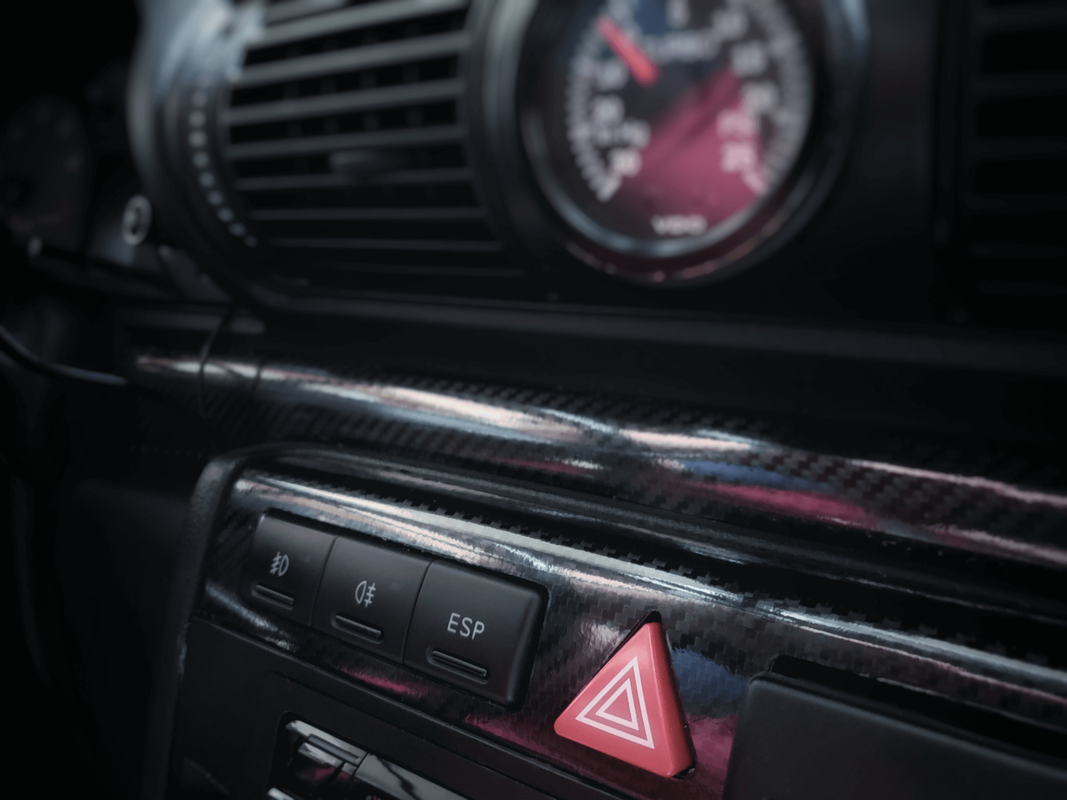
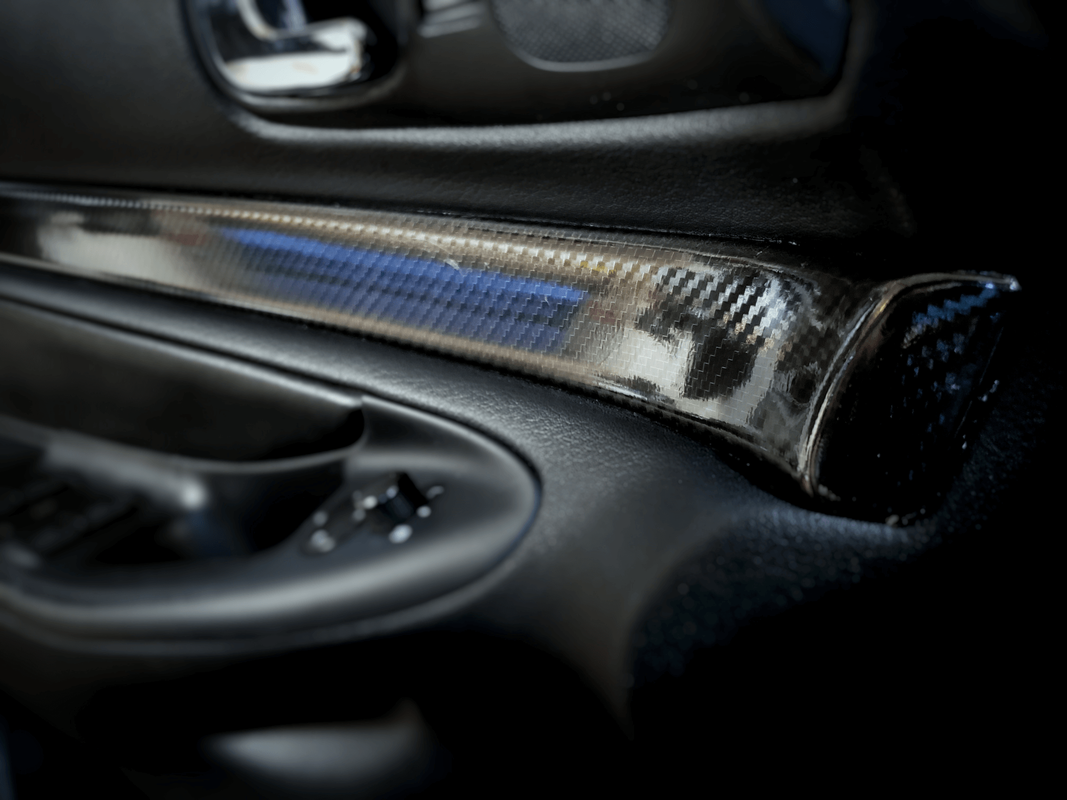
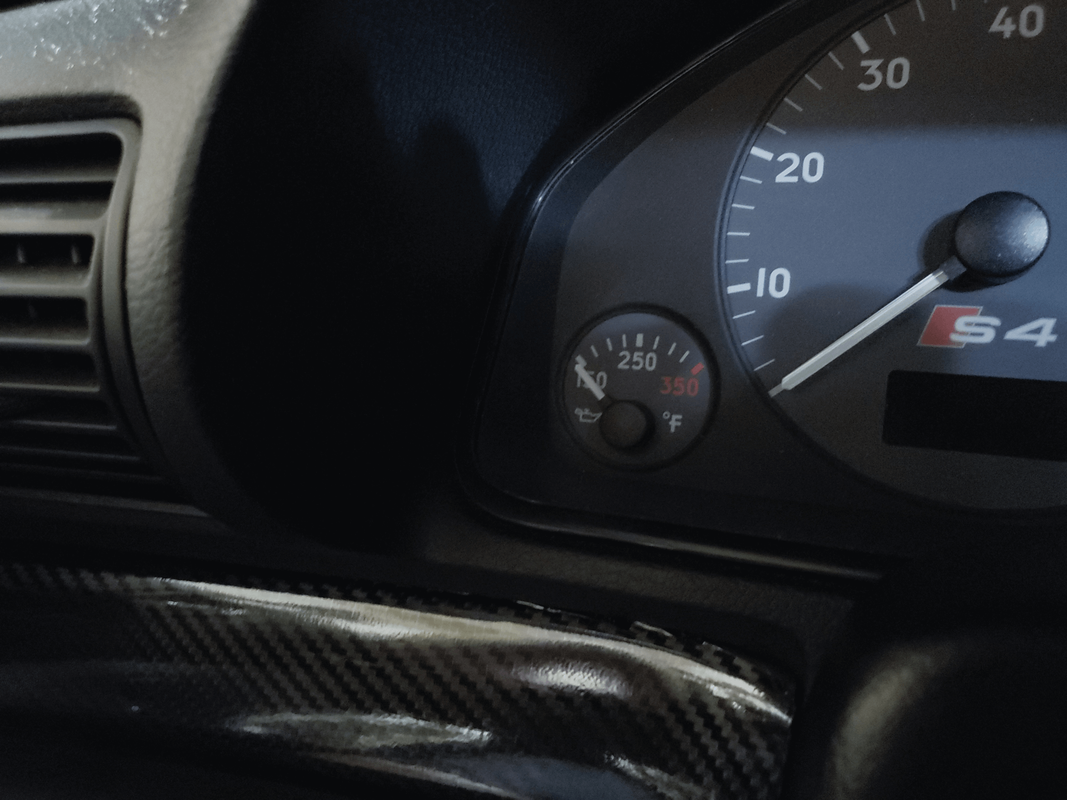
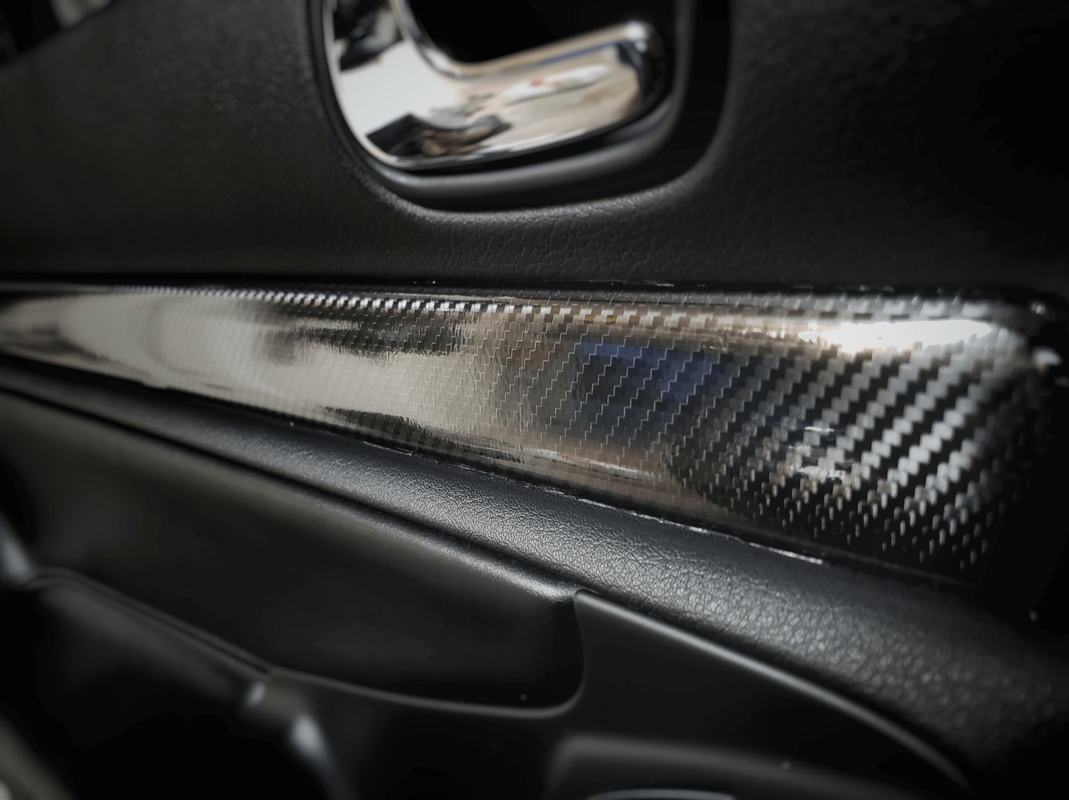
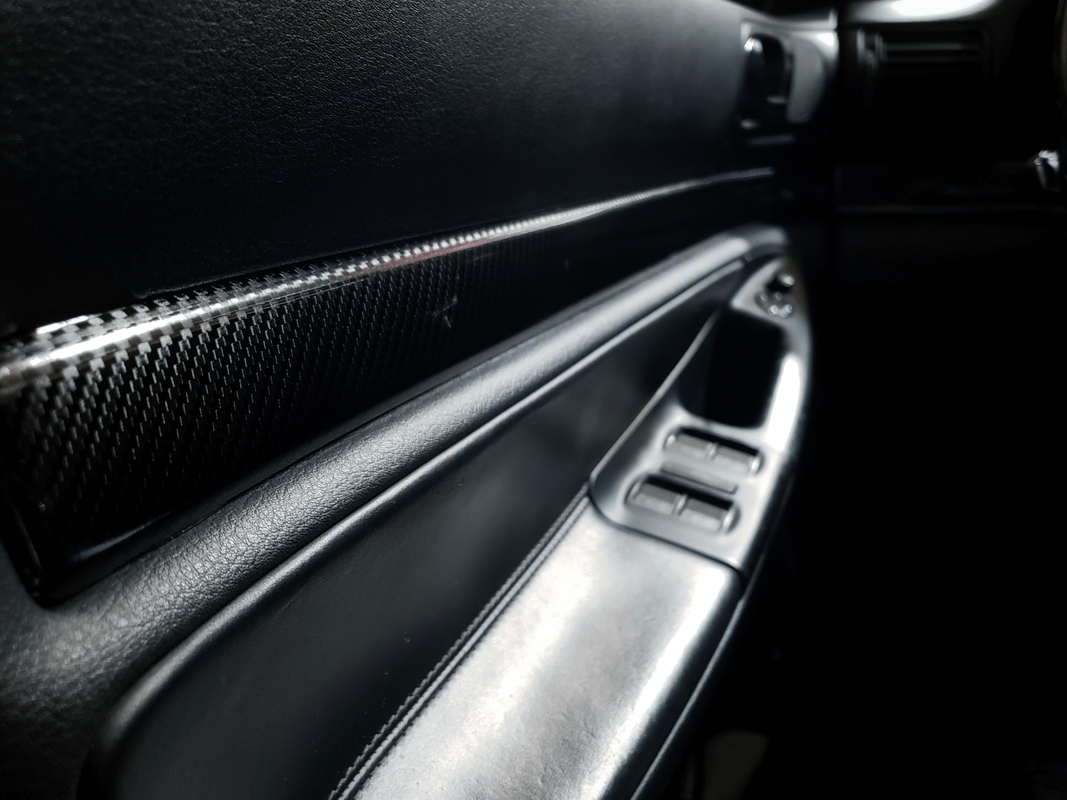
So I got approved for a loan with my local credit union, but man I am having a heck of a time finding any good B8.5 S4 (2013-2015) in the state of Washington. The only one I found was good and at the time I thought at a good price, but the seller tried to say it had a clean record when it was actually a total loss from TX. Thank you Carfax for the save! Anyway, if you know of anyone selling a B8.5 S4 please comment below. I'm on a budget and I'm still not sure what I will do with my B5, but you all know I will baby the B8.5 and treat it with only the best care. Thanks all! If you don't follow this Youtube channel, I highly recommend it for all you car enthusiast. Well the carbon fiber trim wrap is done! Took me about 3-4hrs total to do everything, but I was taking my time trying to clean/prep all trim surface as best I could. I did cheat a little on this as I didn't remove all of the door or dash trim. I did remove the ash tray, shifter boot, and the trim around the cup holder / hazardswitch, as those corners we very visible, plus I just wanted to do a really good job to prep them. As for everything else, I just thoroughly cleaned the trim with rubbing alcohol, applied the film using my Amazon Vinyl installation kit (link), and finished with a little heat and a tracing cut around the each of the trim. I'm actually surprised how easy this really is. The trick I found was that you don't want to heat the film too much, but just enough where it adds a little flexibility when pressing out the air bubbles. When you are dealing with corners, add more heat, and stretch the film around, but hold it until the film cools so it hold the shape. I do think this really refreshed the look of my interior. There is some orange peel effect on the film if you look closely. I'm guess that is likely because I used super cheap film, but I'm still proud of my work. The real test is how this will hold up 90+ degree heat.... we get maybe a week or two of that here around the Seattle, but we will see. Products Used: Carbon Fiber Vinyl Wrap: https://www.wish.com/product/5a0fa38523b4151774024fd7 Installation Kit: https://amzn.to/2O4ecoG For anyone on the fence on doing a project like this, just do it. It is actually fun and super easy. Just clean the trim surface as best you can and I think you will get good results. You all might laugh at this, but I just discovered wish.com. I thought I could get lot on Amazon, but holy crap this site is crazy. That said, I ordered some gloss carbon fiber vinyl wrap and the thought was to wrap the fake wood trim in the S4. I've seen a few rolling with the same setup so I figure I give it a try. I've never done any kind of vinyl wrapping so I figured it would be fun to see how it turned out.... Below is my first attempt around the shifter. I'm only not sure about it being super glossy. I have on order some non-glossy carbon fiber wrap on order just in case I change my mind. So what are you thought? Do all the trim or keep it stock? First off, I bought this tune, with my own $$$, so take note this is not some hidden sponsored blog post. I ordered the Stage 1 tune, and had the software and first revision of the tune within a few days. They do ask for all your modifications so they can prepare the tune as the cable is getting shipped out. You log into their online portal, download their software and download your first tune. With the OBDII cable provided, you connected it to the OBDII port and your PC. Getting the PC and OBDII to connect can be a little fussy some times. If you are a computer nerd such as myself take note that using a USB over serial type connection like this cables can require a reboot of the PC when things to don't work. So for laptop users that just leave their computer in standby mode, reboot and then connect everything to reduce connection errors. That said, you first "Read the ECU" to save a copy of your current ECU setup. As I didn't know what I was running, I really didn't care about that, but did it anyway. After that, to Write to the ECU you locate your tune file that your previously download and get ready to write. You will get warning that it is best to have a charger connected to your battery. I risked it and didn't do that, but I turned off all lights, radio, AC/blower, etc so there was little to no draw. The writing process takes about 5-10 mins from start to finish. Once it was done I disconnected and then connected vcds to do a throttle body adaption. This was not requested by Motoza, but I did it anyway as many forum members recommended it after loading any kind of tune or resetting the ECU. After that I went for a drive for about 20-30 mins to get the S4 nice and warmed up. After it was warm you enable logging via their same software with your laptop and the supplied OBDII cable. They recommend to log for 15+ min to get a good sense of how the car is doing. Do a couple of WOT runs, cruise on the highway, and some city driving. After the logging, you upload the log files to the same online portal. 24-48hrs later they review the logs and provide a new tune revision if one is needed. When I got my second revision, I did the same thing write, log, and report my experience. Currently I'm waiting on my last revision as we are going to bump up the boost a little more. Currently we are peaking at 20psi at WOT so I'm interest to see what this 3rd tune will feel like. They have been very clear that doing this little extra with the boost is likely going to reduce the life of the turbos. If the k03 die, I guess I'm forced to upgrade. Oh darn.
How does this tune feel? Simply great! I drove from Seattle to Leavenworth, WA and back and had a 27mpg average while doing 65+ mph pull most of the way. My S4 pulls hard for being on KO3... harder than it ever has. Keep in mind that I have APR tune and a MTM tune, all I can say is this Motoza tune is heads and tails better than any of the others. Which is not shocking as must S4 owners will say custom tunes are always going to be better than "tune templates" like what is offer by GIAC or APR. The simply fact that is custom to my setup is really bring my S4 back to life. Whats Next? Well Motoza offers a Stage 1+ upgrade, but it requires using 550 CC injectors, but the tune itself is only $40 upgrade. I could do a E85 tune if I wanted, but there is little to no E85 stations around the Seattle area. So I'm out of luck with that. I think I'll get the 550 CC injectors later this summer and do the Stage 1+ upgrade. This should pump out another 20-40 more HP and 10-20 ft-lb of torque. Nothing huge, but it does prepare me for future K04 or other hybrid turbos. In Summary, if you looking for a new tune, or maybe you were in my boat and didn't know what tune you were running, I can't recommend enough about Motoza Performance. The tune is impressive and the service and support and honestly the best I've ever experienced ever in my life. And best yet the price is hard to beat. Link: http://motozaperformance.com/product-category/software/audi/audi-s4/b5-2-7t/ Price: $349 (as of June 2018) I am so glad I was able to make it this year. We had 6 cars show up for our pre-meet include a Audi R8 and everyone was just really cool. If you never have gone, I highly recommend it no matter what shape you car is in. Below is a little video I made just so you can get a feel of what it was like this year. Enjoy! Man I feel like someone higher up really didn't want me to install this M3 lip on my S4. So if you saw my previous post, the first paint attempt fail at the end. Color didn't match and some bubbling occurred. I sanded it all down and tried again, but pained it black. All look good until I picked up the lip after it was drying and all of the clearcoat started to crack. It hit me after the fact that the humidity was too high and I was not allowing enough time between coats. This is a fail on my part. Waiting a day I started to sand it down once more. At this point I've almost paid the same amount in sand paper as I have in the lip itself ($30). This project was failing fast. After hours of sanding I put the lip on the trunk of my car just to keep it off the ground. Next day I leave for work planning on coming home during lunch to prime it and start the process again. I get home for lunch and I can't find my lip. So I pull up my home security cameras and see where things went wrong.... like an idiot I drove off with the lip just laying on the on my trunk. I drive the same route back to work to see if I can find it but no luck. At this point I consider that lip is lost so I go back on to eBay and buy a new painted lip. The painted lip was $20 more and I'm kicking myself for not going that route from the start. Literally hours later my wife calls and tell me she found the original lip. REALLY?!? I figure if the new lip doesn't show on Wednesday (today) I would start the painting process again on the old lip as I really wanted the lip installed before the Leavenworth Drive. I get the notice on my phone it was delivered but per my security camera nothing was there. Immediately I start fearing someone took it and start going back in my security cam history, but I can't find any record it was delivered. No FedEx truck no nothing. My sanity is start to hit a real low point now. Try to keep things in check I contact FedEx and they reach out to the driver. The driver thought he delivered it to a different unit in my townhouse complex. Apparently knocking on her door scared her so much she came down yelling at us. Both my wife and I finally get out of her that she did not get a package so we start heading home. I check my phone and see another voicemail from FedEx saying they know where it is. Apparently the eBay Seller fat-fingered my address and the FedEx driver just guessed and delivered it to some random home that didn't even have the same matching house number. I go to the house and knock on the door just in case someone was there as I could see the package was on the front. No one answered so I took it home praying this lip was ok and more importantly painted. Back at home, I open the box and luckily it looks perfect. Thank god! I prep the trunk and clean it all down and start measuring my halfway points to get this lip all aligned and ready to be installed. It took a me a few attempts but in the end it came out good. FINALLY!!!! This M3 lip spoiler project has been a pain in the a$$, way over budget, but it is done. Up next is a good wash and wax for for the Leavenworth Drive... | ArchivesNovember 2022 CategoriesAll |


 RSS Feed