|
Not a lot of pre-meet activity going on in regards to the Leavenworth drive on Saturday June 16th so I figure I try to organize a pre-meet for those that don’t want to be up super early or want to avoid the traffic we cause.
Meet Time: 10:30am Roll Out Time: 11:30am Place: 60 acres fields in Redmond WA It’s the southeast parking lot. It’s the biggest paved parking lot if anyone gets confused. 100+ parking spot Google Maps Link: https://goo.gl/maps/HDjVUprJp242 Official Leavenworth Drive Details: https://www.facebook.com/events/2057124151231347/ (take the time and read this over) Other Details: If you can make it, please post so we have a good figure of how many are joining. I'm hoping we can get a group of 10-15+ cars but it would be awesome to see way more. This meeting spot is technically a King County park, so lets be kind to it as best we can. Aka no burnouts or excessive noise please. I know this starting point is going to be hard for us to stay as a group so if you get separated I'm sorry in advance... not a lot we can do. During the meet we can figure out which route to take to get to HW-2
0 Comments
Well I've come to the point that I don't like running mystery tune. Let me explain.... When I first got my car it came with a APR tune, but fast forward a few years that ECU died so I bought a ECU with a MTM tune. The seller had no idea what stage the tune was so I've been risking it for the last 4-5 years. Just recently I bought a ECU with a APR Stage 2 tune off of eBay, but after going to my local APR dealer no APR program was found, the ECU was tuned, but again we have no idea with what. The eBay seller which was a very cool guy said he bought the ECU from eBay and just assumed it was a APR tune. I trust the guy so I hold nothing against him. I have a spare ECU so I can't go wrong with that. I figure I would try something new and saw a great review of "Motoza". Nearly half the price of other tuners, is loaded remotely, and can but customized like coding our O2.
So I've been emailing them tons of question this week and so far they have been nothing but fast and extremely helpful. I purchased the Stage 1 tune to give them a try. They required me to list all my customization I've done to my S4 before they build the tune file which I find very cool. No longer will I be running a one size fits all tune but one that optimized to my S4. I should be getting a cable and software this week to load the tune. Once that is done we start collecting logs so that the tune can be optimized even more. It is nearly the same process of doing custom tune at your local tuner minus the dyno. They offer multi-tune option if I want to switch from 91 to 93 oct, which is similar to the APR. I'll properly upgrade to that if all goes well. What I'm most impressed with, is that I can upgrade to there next stage and it only cost $40, but I would need to upgrade my fuel injectors. All in all, I'm pretty excited about this and look forward to "feeling" the results. I'll post a full review later this month once everything is installed and optimized. Link: http://motozaperformance.com/product-category/software/audi/audi-s4/b5-2-7t/ If your cruise control has stopped working I found this tip that is free to try. Apparently via the Vag Com (VCDS) you can disable/enable cruise control via a login code of "11463". So I followed the steps in the video and it sure it enough my cruise control is restored. YouTube Link: https://www.youtube.com/watch?reload=9&v=3RrdtjXe660 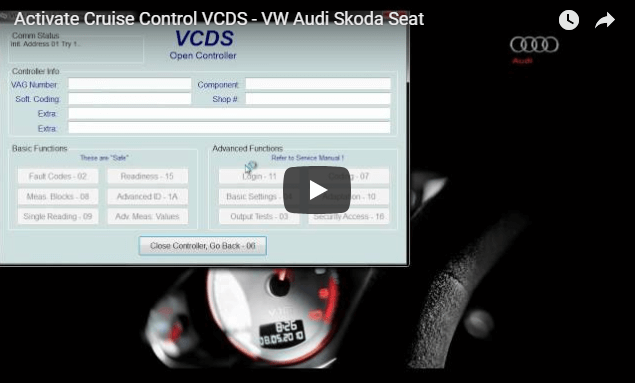 I've always had any eye on the M3 trunk spoiler that other owners have installed. I found an unpainted lip off of eBay and order some color match spray paint to give it a try. 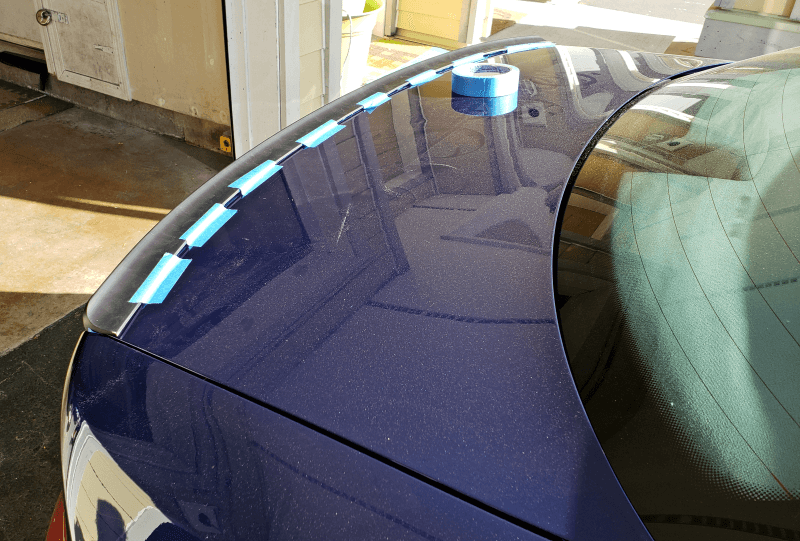 Initial test fit looked very good in my opinion (see above). It looks clean and nearly stock like. So I started to prime, sand, and apply the base coat. As this was my first time doing any paint work, I tried to study up on good old Youtube to make this look as stock looking as possible. 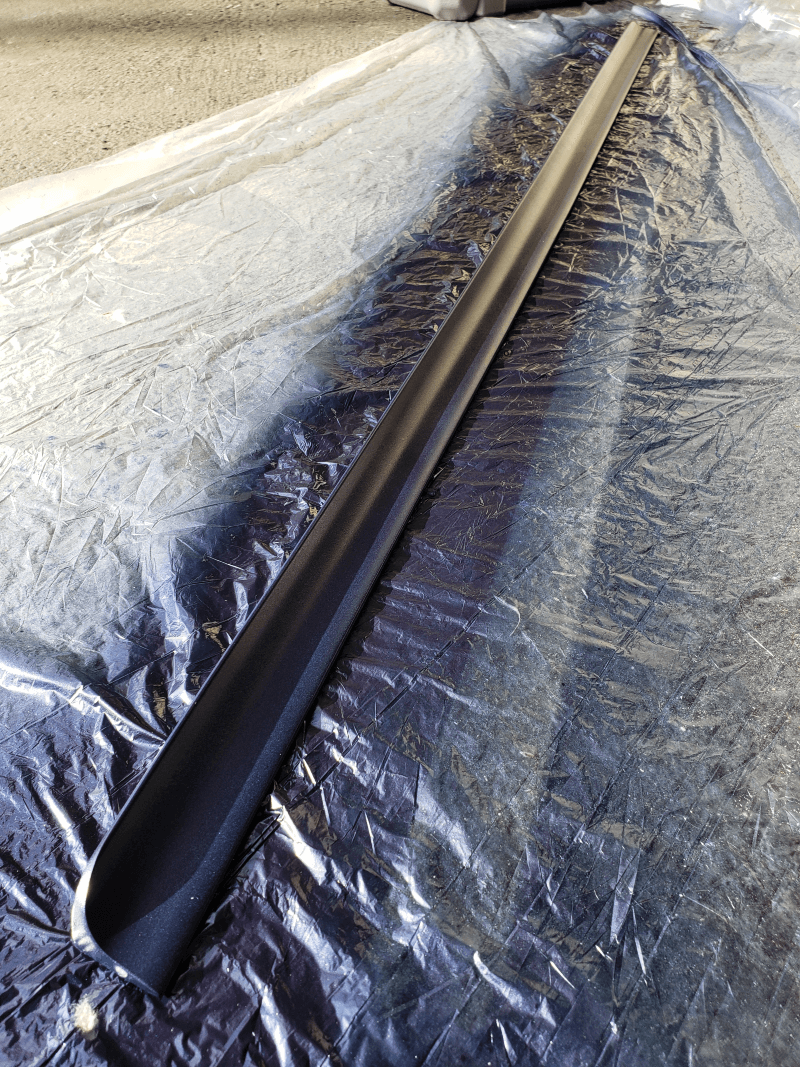 At this point I have the final basecoat completed and ready for clearcoat. Cottenwood around the Seattle area is getting bad so it was a constant battle to keep it away from the lip as each coat was drying. Fans and cans of compressed air for the resuce. 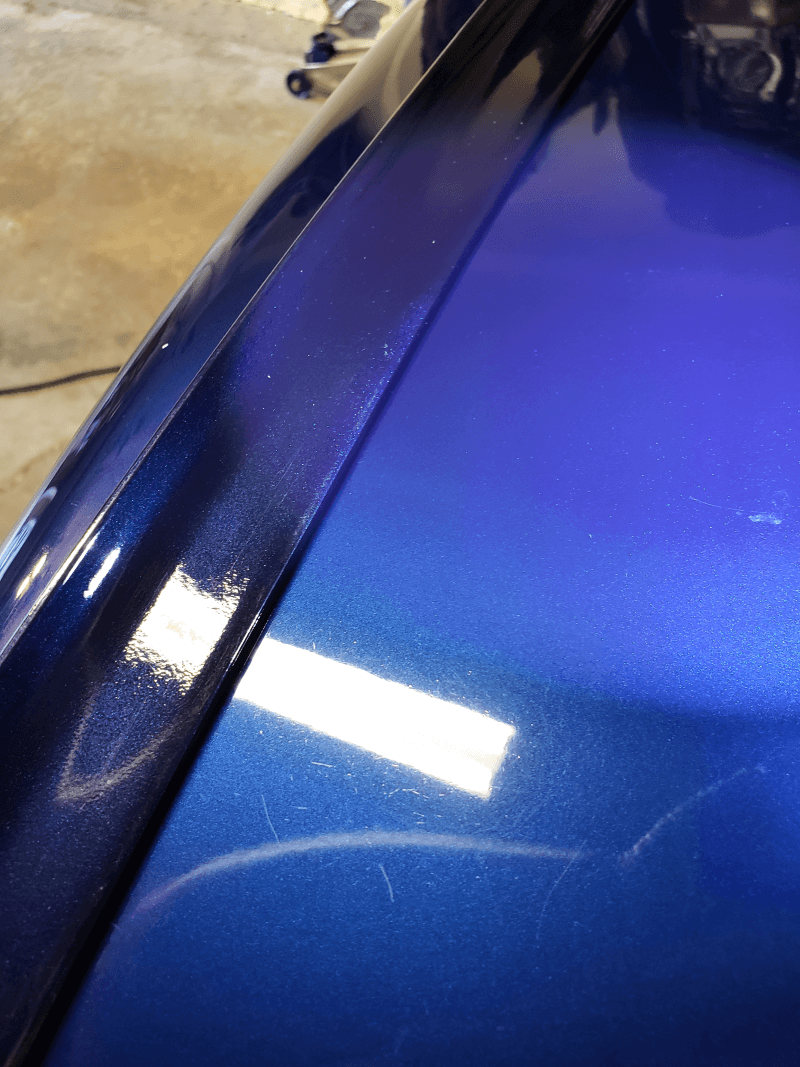 Clear coat applied, wet sanded, and quick polish completed (above). I wanted to polish more but had to stop because the color shade difference was just too much for me. If you don't notice, the lip is much darker than the trunk. Either my cars natural color has faded or it was was the primer being more of a dark gray vs the stock is more of a white. I left the lip out in the sun for a few days to see if it would help but sadly no change. From everyone I talked with, I would likely need to get a custom shade of blue to match my already faded color on the S4. As this was really a project I wanted to keep under $100 and I wanted to get this done before the Leavenworth Drive I decided I was going to go with stock Audi "Brilliant Black" color for my second attempt. Much cheaper then getting a custom color and it should be here in a few days. I've see a few other S4 with black colored lip and it looked pretty good.
In summary, I'm still pretty happy with my work as this was my first time doing any kind of automotive painting. I think the second attempt is likely going to look even better. Until then.... ***UPDATE*** - Lip now installed see here. Found a new M box ecu with a APR Stage 2 on eBay that I could not pass... plus the seller was very cool. I just installed it today and so far no problems. The power is much more linear and predictable than my previous MTM tuned ecu. The MTM does feel like it was tuned with much more low end torque and peaking around 18psi and then coming down to 13-15psi. The APR peaks at 15-17psi and then hold that psi. All in all the APR just feel smoother, not really faster. I know a lot of people say the APR tunes are very conservative, oh well. So why did I get a new ecu? I always felt like my MPG went way down since I got the MTM tune ecu switching from my organically APR tuned ecu. Not to mention I liked how with the APR I could switch to "stock" mode if I know someone else would be driving my car or I want the best MPGs possible. All in all, this is just an expensive test to see if I'm right about better MPGs. The up side with the APR tune is that my Check Engine light now works again. I believe whoever did the MTM tune coded out the CEL. Also, this Stage 2 APR tune codes out the rear O2's so I won't be seeing those errors anymore. 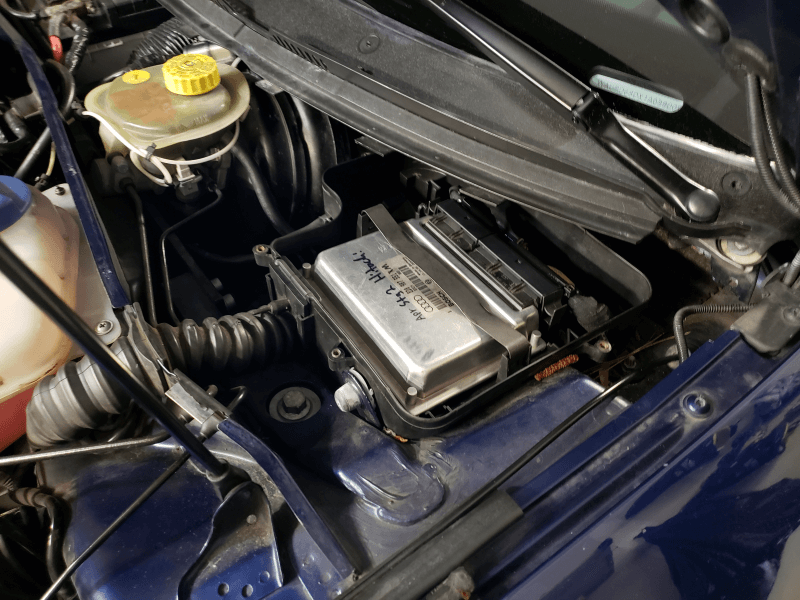 My oil temp/level sensor went out about 5k miles ago which of course was shortly after my previous oil change. As the oil sensor is on the bottom of the oil pan, I was stuck with the error messages until the S4 was due for another oil changes. Today was the day I finally got to replace it. Out of all the things I fixed on this S4 the oil sensor was by far the easiest. Drain the oil, take the 3 bolts out holding the sensor into the oil pan, unplug the harness and work in reverse for the new sensor. Sadly I'm so used to something going wrong with "easy" repairs, it just feel odd when a repair actually goes to plan. I'm so glad to get rid of the stupid "Oil Sensor" warning light and beep.
As for the 034 Stainless Braided Brake Line Kit, it is currently standing by ready for install. I typically don't mess around with brakes and leave it to the professionals. Hopefully I'll have them installed and the fluid flushed before the 2018 Leavenworth Drive. Over the weekend I rolled and slightly pulled my front fenders. As much as I tried to keep the paint flexible with heat, sadly some parts still cracked and pealed off. I got some touch-up paint on the way to correct. That all said, this has eliminated all rubbing issues I had before. 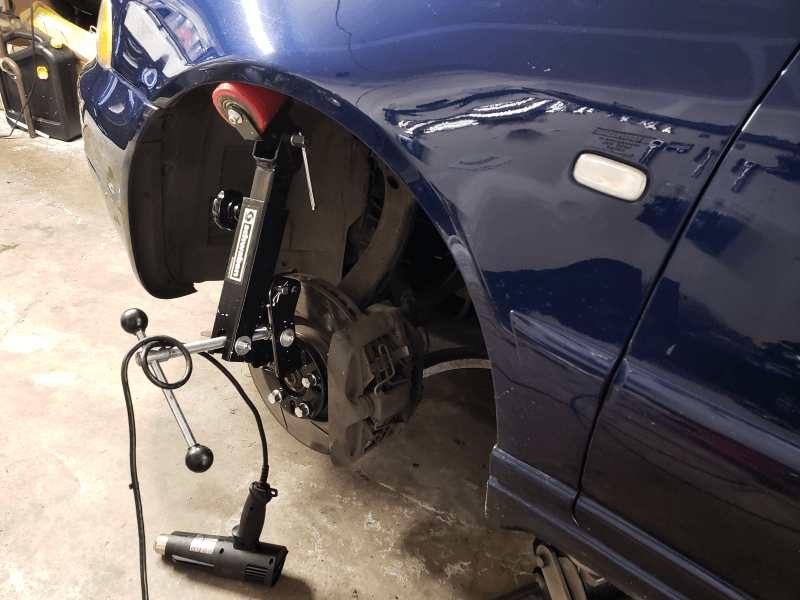 Last night, I got my new Kenwood Excelon KDC-X702 installed to replace my 10+ year old Alpine CDA-9885. While the layout of the buttons is a little odd on the new deck, the sound is absolutely amazing. This deck really does bring life to my recently installed Infinity KAPPA speakers 5.25in (front) and 6.5in (rear). I simply had no idea the bass this deck could produce through those speakers. And when I turn on my JL Audio CS112LG-TW3 12in subwoofer, holy crap, it was like I was in a new vehicle. The sound was so full, rich, and generally awesome it's almost distracting to drive my car (no joke). Saying I'm blown away is just a understatement in my book. While this deck lack some of the new features like Apple Car Play and Android Auto, you can still activate Siri or Google Assistant which is more than enough as I got my phone on a mount to view Waze/Google Maps. The best part I got this for $129 as it was refurb unit so I feel it was a steal. 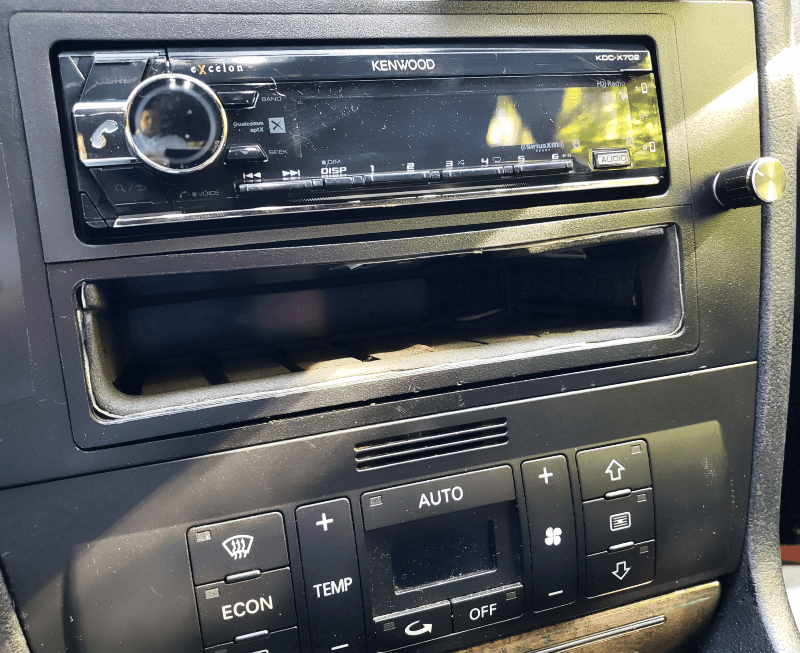 If you all are wondering what is in the storage area, that is just stick on foam that help stuff from rattling and sliding out.
Since 2011 I've been searching for a used hood as my little brother backed into me while we were installing some HID's in his car. As we all know, there is limited number of B5 S4's that made it to North America so it's been a needle in a hay stack kind of search. Finally I found one a short drive from home from another B5 S4 enthusiast. It was from his "parts car" that sadly got flooded after a drain valve got plugged. Installation of this new-to-me hood took me about a hour getting the washer hoses/wiring in place and the hood aligned perfectly. The following day I did a quick clay bar over the hood to try and get as much contaminants off of it and a quick wax. When it is warmer out I'll do another clay bar treatment as it still needs a little more love. That said, I'm happy to have a dent free hood back on my S4. If you saw my previous post I found a thread on Audizine that someone got a aftermarket R8/B7 key fob from eBay to work with their B5 S4... I went on to eBay and bought the fob and all worked great, minus the fact it was missing any Audi branding. 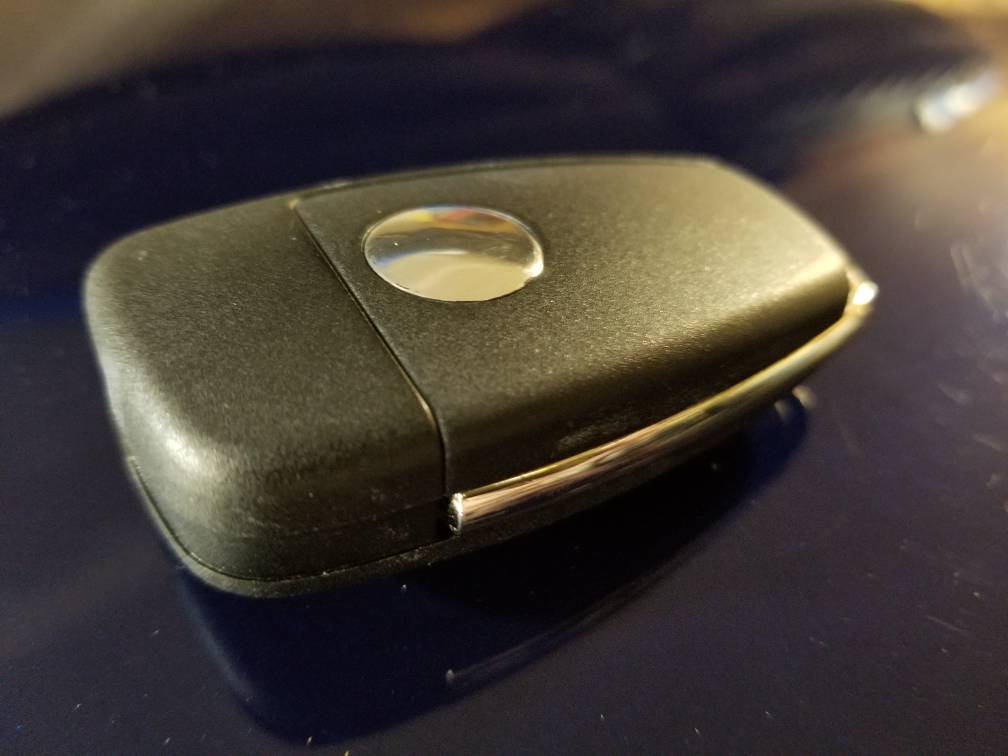 So I've been on the search to fill the silver circle where a Audi logo should be.... luckily I found something on Amazon: https://amzn.to/2q9ouKR Got the new sticker and it fit perfectly:  If you want to learn more about this aftermarket key fob please see my previous post:
Well I replaced all my front control arms in July during the coilover installed, but sadly two have already failed. The lower front control arms ball joints started making a really back metal scraping noise when I turned the steering wheel. The sound was so bad that I scared a few people while driving in a parking lot.
The best part is when we put my car up on a lift you could lift the tire up about 1/2 of a inch because there was that much play in the ball joint.
So, me and my friend Erik got those replaced in a couple of hours. Followed by a alignment at Firestone, and I was back on the road. Well my S4 has been slowly leaking coolant for 4+ months now, which I really thought nothing of it as we have had a abnormally warm summer here in the Seattle, WA area... that said the past 4 weeks things got worse as I've need to add more coolant/water nearly every week. I quickly ran out of coolant so I started adding just water which I knew was bad for the coming winter months (freezing temps = cracked block). The odd thing was for the longest time I couldn't find where it was coming from. There was no large puddles under the car for me to find. I thought for sure it was the coolant sensor as that has been a leaky point in the past. So I took that out and replaced the o-ring, cleaned the sensor, but the coolant was still running low after a week. I called in reinforcements and my buddy Erik (find him here) spotted the problem in about 5 seconds. A look down the front of the engine looks like my car had sneezed coolant everywhere right around the water pump. I've never done a water pump replacement so Erik was once more in for the rescue. Sadly this did mean the front end of the car would need to be removed and another timing belt replacement was due. Previously the timing belt and thermostat in 2013. As for all the part we replaced, I'm sure I'm going to forgetting a few things but here goes the list:
And unrelated to the coolant leak, but since the car was on the rack we added a few minor upgrades:
In summary and around 6-7 hours later we were all done. We ran into a few issues but they were all worked out, in all a pretty smooth job. No leaks detected at this point, and the Snub mount and new tranny mounts sure do make my S4 feel a ton better. The first thing I noticed is if you are in gear and lift off the gas, there is very little movement in the shifter. Before it felt like the shifter would move almost a 1 inch because of the engines back/forward play. No new vibrations or anything, so I'm pretty happy with it. Big thanks to Erik (find him here) as without his expertise I would be in a world of hut. I can't recommend him enough if you are in need of a truelly honest mechanic in the Seattle/Redmond area. It was sunny and I was out playing with my DJI Mavic Pro drone... so I figured my S4 should get a little love as well. Found this key fob from a post on Audizine and purchased off eBay. Works great except the trunk button doesn't do anything. I'm just glad i finally have a spare set of keys.... only took me 9 years to get another fob. Just for the record, the B5 line does not use a "immobilizer chip", so if you get one of these, don't get suckered into paying for that to be "programmed". The locksmith I went to get the key cut was convinced it would not work, but I got to show him that he was wrong.
And a little videos to show it really works: Before you start, make sure you have at least two keys that can manually unlock/lock your car. You can not program your key fob with only one key. Clear your Key Fob Memory Positions Our B5 S4 can store up to four key fobs for wireless entry, but to simplify the process of programming it best to start with a clean slate.
Re-programming your New and Old Key Fob.
Troubleshooting When I first attempted this I noticed I could only get one remote working at a time. That is when I realized I was saving one key fob in the same memory slot. Take careful attention to step #3 and #8 as you are selecting which "memory slot" you are recording the key fob too. The number of times you press the unlock button will instructed which memory slot is used. 3 presses will go to memory slot #3 or a single press would go to memory slot #1. Remember, there is only 4 memory slots, so don't go crazy and press the unlock 5 or more times as that will clear all key fobs and you will have to start over. 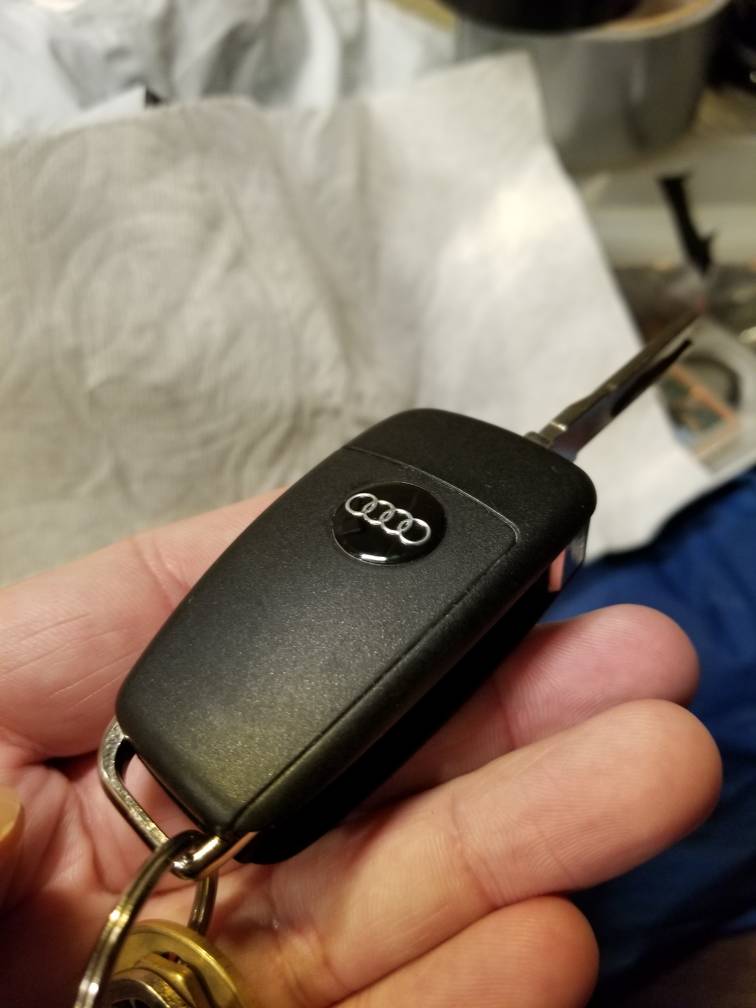 New picture with Audi logo
It's been a busy month so far with the S4. I did just finished installing the 2.0T Coil Conversion kit I got from ECS Tuning.
Performance Differences? In summary, no, not really. It kind of feel smoother when accelerating past 4000rpm to redline. I did replace my spark plugs at the same time, so whatever I feel could simply be fresh plugs. The good news is I'm able to run a larger gap with my spark plugs. I left them at the stock 0.028 inch gap and no misfires. Before if I ran anything over 0.024 inches I would get misfires in cylinder 6 at WOT. MPG does seem to be 1-2mpg higher as my 30min test drive on the highway shows 27-29 MPG. Again this could just be the news spark plugs. I do continue to feel slight shudder every 5-10 seconds when the car is at idle, but I have a feeling this is likely because of a vacuum leak around my intake boot. (WOT = Wide Open Throttle) Thoughts on the kit? It certainly feels over priced and I knew that from the start, I just didn't want to deal with making a wiring harness from scratch... So yes, I'm paying extra from convenience. As well, the extra wiring kind of makes the engine bay look messy. I'm sure with a few black zip ties here and there I could clean it up, but I'll do that a few weeks from now once I'm confident that everything is working ok. I do really like the 1 piece mounting plate for each side of the engine. I pick the black color as I really don't like a flashy engine bay. The mount just look more OEM in one piece vs some other setups that have a separate mount for each cylinder. As for the wires they all look very OEM. The once thing I don't like is the length of the ground wire. It seems like it should be 1-2 inches longer so nothing is pulling on it. As the wiring is routed at this time, I'm sure a year from now I would be working on fixing broken ground wires. How was the install itself? ECS on their instructions claim this as a "easy install" and I do agree with that. The hardest part, as with everything on this S4, you spend more time moving stuff out of the way than you do with the actual installation of whatever part you are working on. Remove airbox, relocate coolant reservoir, remove old coils, install 6 bolt per mounting plate, press in the new coils, connect the wires, re-install airbox/coolant reservoir, and finally go for a test drive. So it's a rather easy install. I think it took my 2.5hrs to complete but I was going at slow pace. Would I recommend it? I would say that it is too early to tell. If you are bored and want to replace something with something "newer" because you got the itch... sure go for it. If your stock coils work without issue, then no, this would not be worth it for you. For me that cylinder 6 misfire is the main reason I replaced this as I wanted to see if it would help correct the misfires that seem to come back every 12-18 months. Wow I forgot what a pain in the butt the fuel filter is to install, but it is in there. The last time I replaced it was back in July 2008, so I've put about 80k miles on the old one since then. I think it took me about 2.5 hrs to complete, but thankfully it was mid 70's here aka perfect car maintenance weather. After the install I did do the "blow" test on the old filter (sorry I know that doesn't sound right) and it flowed with no issues. The theory is if you can easily blow through a old filter then it is still good. I'm rather shocked that it was still good with 80k of miles on it as some have said to replace this every 25-50k miles. If anything that just shows the Costco Premium gas I've been running for the last 8-9 years is very clean.
Anyway, 2.0t Coil pack conversion install still in the works, I just wanted to do all of this in stages so I could tell if there is any difference in performance. At this point, no difference in fuel economy or power with the new fuel filter. Sorry this is a teaser, but I just got my 2.0T Coil Pack Conversion kit from ECS Tuning. I hope to have it installed in the next week. I know some people say this is overkill or unneeded, unless you are having issues with your coils. Well last week my cylinder 6 coil died, again. I've lost count how many times I've had issues with coils on this cylinder. I willing to see if this helps at all. I know expensive test, but it's worth a try. Well keep you all updated once installed and tested.
Also got some other parts to install: I'm pretty sure the S4 will be running very smooth after all of this is installed. As promised, it is time for a update on my Solo Werks Coilovers install. At this moment I'm running 25.5in ftg (fender to ground) so I'm certainly not "slammed", but before I get into the ride quality I need to start off with a "oops" story so you all don't make the same mistake.... From the time of the install up until a few days ago the front end of my S4 was sadly not "settling" as I thought it would. Kind of like buying a new baseball glove, the more you use it (aka drive) the better it "should" feel. Well for me that wasn't happening for the fronts as they were just plain bouncy. It was just odd that the fronts were just so bouncy with zero compression. It was embarrassing like I was driving a car with trimmed stock spring using blown shocks. Reviewing the Solo Werks Coilovers instructions I noticed during the install we missed a step in "priming" the shock absorber. Contacting Solo Werks they highly recommend doing this but I believe their reason was to verify shock absorber was functioning correctly not to change the characteristic of the ride. I read of at least one report where someone did have a bad shock after priming it, but I just couldn't believe both of mine would be bad. So... last weekend I decided it was time for a inspection. Once the fronts was in the air I noticed that the dust covers were very close to the top coilover perch. Looking at a few other coilover install pictures, Youtube install videos, plus Solo Werk instructions, it seemed like very few people transferred that dust boot over. When I dropped the front back down to the ground I could see the boot was clearly going to mess with the travel of the suspension. So I started to trim it... 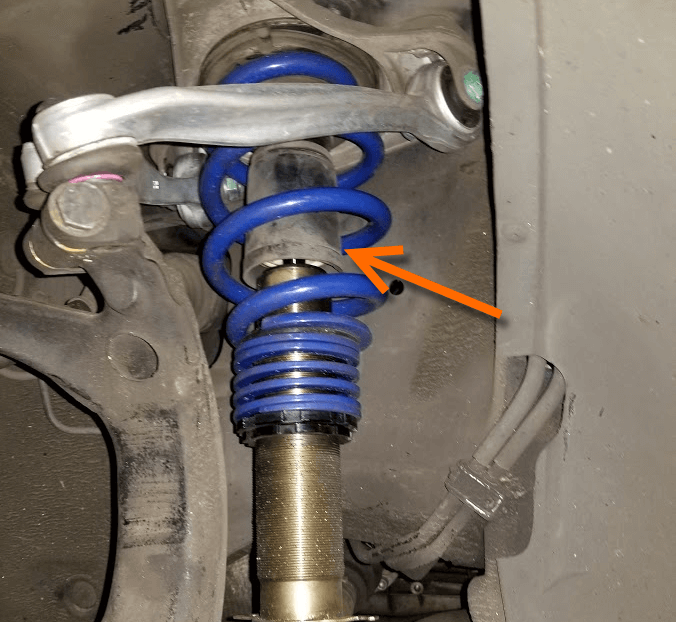 This is where the oops happen. Trimming the dust boot I noticed something orange (see pic below), oh crap, the front coilover got doubled up on bump stops as they were hidden in the dust boot. In fact the dust boot appeared to be molded around the stock bump stop. To get the old stock bump stops out I had to completely destroy the front dust boot covers. 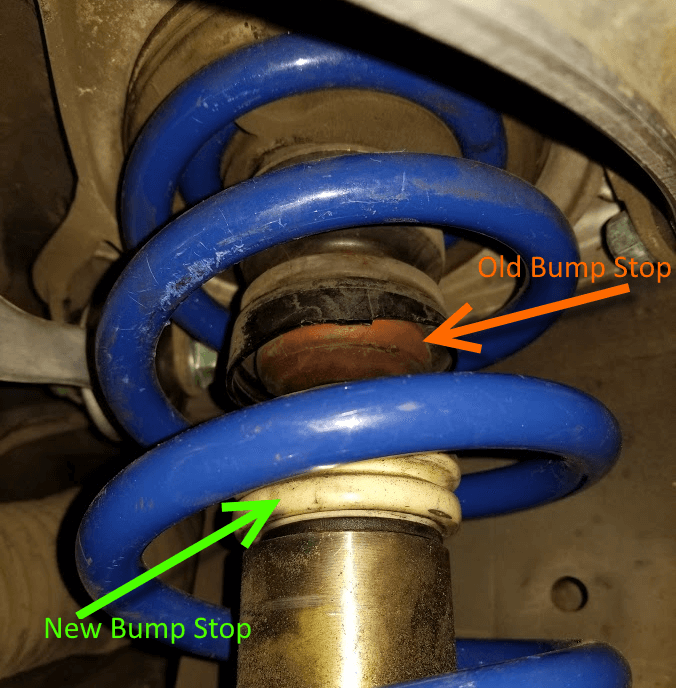 Several hours later, stock bump stops removed, I dropped the front of my S4 to the ground and immediately noticed both front corners dropped down another 1 inches, so I was at 24.5 ftg. This just showed me that I was literally riding on the bump stops creating the bouncy ride for the front end. As I knew I was going to need to make further height adjustments I took the S4 for a test drive. WOW, what a difference the front felt when it could actually travel freely. That said with my front 10mm wheel spacers I was rubbing like mad around corners. As well even when going over minor speed bumps at a angle doing 1-2mph the car was slightly bottoming out on the sub frame. While I sure loved the look of the S4 at this height, it wasn't going to fly. After the test drive/fill-up I headed back home and settled on 25.5 inches ftg all around. The second round test drive was much improved with no rubbing nor bottoming out. With my oops story all said and done, how does the ride feel? I can certainly agree with the advertised claim from Solo Werks that this is a OEM+ like feel. Keep in mind that my S4 has nearly 177K miles on it and I got it with 80k, so I can't really tell you what a fresh stock ride felt like.. Comparing with a 177k stock setup, these Solo Werks Coilovers feel slightly stiffer than stock, but certainly not harsh. I would account the stiffness to less travel with a lowered suspension. I'm willing to bet if I could raise these coilovers to stock ride height that you could barely tell the difference in ride quality. Overall my S4 feel completely renewed with these coilover and all front control arms/swaybar links replaced. Greatly reduced body roll, solid steering feel, and generally a upgraded level of convenience when going into hard corners. At this point, I simply impressed with these Solo Werks Coilovers. If you are looking to lower or generally renew your daily driver like I did, I certainly recommend these coilovers. What's next? As the fronts have basically now started their settling process I'll post another update later this summer if there is any changes. I do want to figure out a way to rebuild the front dust covers if possible. I'm kind-of thinking about using rubber boots like used for CV's. We will see... 1.5 years later the planets aligned and finally got my box of parts installed. I have no plans to slam my S4 but i did lower the front by 1-1.5in and the rear 1in. A full review will come likely early July after I give it a month to settle down. I know.... what happened to the Coilovers? Well they are still in the box as I just haven't had the time to install them yet. Maybe some time after Xmas if I'm lucky. As for now, I replaced my spark plugs with a new set of copper NGK BKR7E from ECS Tuning. This is my second set of these plugs and they have been working flawlessly. I normally keep the gap between .020 - .024 inches but figured I try the gap of .026 to see how the car runs. In the past I've had issues with misfires because I assumed the gap recommend on forums were correct, which there weren't. OEM spec is between .016 - .024 inches, so lets see what happen. The drive to work today with a few WOT's and no issues so far.
Next I installed the Aero Wiper kit from ECS Tuning and cleaned/re-lubricated the Wiper Transmission (linkage) found under the windshield. I used the steps from this YouTube video to learn how to take the wiper transmission/linkage out to perform the cleaning. It's actually a rather simple process, but as with anything on this car, you got to get a layer of unrelated parts out of the way. For this case, it was getting the ECU box and the ECU itself out of the way. Breaking down to clean/lube the wiper transmission/linkage was a breeze. I didn't go crazy with specialized grease, but rather wiped away any junk at all friction points (aka, any points that moved, minus the motor) and reapplied with a small amount of white lithium grease. Re-installed and even with the stock wiper arms still on, everything was noticeably smooth in the wiper's motion. The following day, Aero kit arrived so I got that installed. That is literally just popping off the plastic caps on each stock wiper arms, remove two 13mm nuts, and gently pry off the stock arms. I used a 13mm wrench and slid the open-end of the wrench under the stock wiper arms to pry them off. Apparently there is a specialized tool that can do this, but the wrench method worked just fine for me. Install the new Aero wiper arms and a few rounds of aligning those arms via trial and error I was good to go..... I do have to warn, DON'T leave your hood open with the wipers on. The driver side wiper arm will come into contact with the top of your hood. I learned the hard way. Wipers work great now and they are fully ready for winter's worst... with a lower profile look. After 5 years of waiting, my S4 is going to get a nice well deserved upgrade..... What did I get? First I got a complete front control arms kits. No, I didn't go with any "HD" kits as the price is just insane for them. Let face it, for most control arms kit the only major difference is how long they are going to last. I have a very short commute to work, and living outside of Seattle, the environment is not at all harsh to my car. This low budget kit is likely going to do me very help. Not to mention, I'm likely not going to have this car longer than another 3-4 years... assuming my stock turbos hold out until them. As for the coilovers, I went with the Solo Werks S1 Coilovers. I first read about them on the Audizine.com forum a little over a year ago and have been tracking all the user reviews very closely. These coilover are said to offer a stock like ride quality and a great range for the ride height. For the most part claims like that aren't backed and the poor souls that purchase the kit typically finds out the hard way. That said, every review I've found for these has in fact reported very positive results. The common response was that they are "slightly" firmer than stock, but not at all as harsh or bouncy like other low budget kits. Keep in mind these coilovers are not designed for "race" setups but more the enthusiast commuter. Simply put, this is exactly the quality setup I'm looking for. I'm going to try and get all of these install sometime this month if time permits and if I can get a open lift from my buddy Erik at I.P.M. Auto Service. I'll post a initial review and lots of pictures after that install is completed. The real test is how they feel after a couple of months of use.. so I'll make sure to post another review after that point. Until then...  My valve cover gaskets have been leaking for a few years now, but this spring it was getting really bad. To the point that the oil was getting on the exhaust and creating a lovely burning smelling within the cabin. Using the re-circulate is fine during the summer, but it would creating a fogged up mess if I had to use that during the winter. So I order the following kit from ECS Tuning:
Two weeks later, I went over to my buddy's shop (I.P.M. Auto Service) and started the open heart surgery, as he likes to call it. As with most projects within this engine bay, 50% of the time is just getting stuff out of the way before you can even start replacing all of the parts. We didn't use every part in the kit, but here is what we did replace:
At the end of the day it was about 5 hours including a oil change to complete. The end result is to be determined at this point. When the the Valve Covers were removed, there was a fair amount of oil that leaked so it hard to tell what is new and what is previous. I'm think a few more days of driving should burn off the residual oil and then we can take a closer inspections to look for any leaks. With the oil change, I put in 0w-40, so if there is a leak, the thin nature of this weigh should find it when warm. Hopefully we are leak free. Well we had a threat of snow this past weekend. Only 1-3 inches, but for the Seattle, WA area that considered a good amount. Sadly we only got a dusting and icy roads. Very lame that I could not take the S4 out in the powder and have a little fun. I can say that I'm very impressed how long my Dunlop SP Winter Sport 3D tires have held up. I'm on my fourth season with them and they still look new with tons of tread left. Don't get me wrong they aren't crazy ice mastering tires like Bridgestone Blizzaks, but for a Performance Winter Tire they really do a great job on all surfaces when temps get low.
Go a dashcam for my bday and figured I might as well us that so you can see what these retrofitted fogs look like from the drivers point of view. Honestly I can't figure out why Audi didn't do this from the start, but it's parent company VW put it on MK3 Jetta's and GTI's. Seems a little backward, but oh well it working good. To see the original DIY click here. Not a lot has been happening lately. Proudly I can say the S4 has been pretty problem free for some time now. That said, it kind-of feels odd when something isn't wrong.... so, you go looking for something to fix. In that past that can get me trouble so I figure I keep it simple. I put in my K&N Air Filter back when I first got my car, 80k miles or more ago, and I'm sure it likely due for a cleaning. If you have a K&N filter you know it comes in a cherry wood red like color, but mine was more of a charcoal gray.... clearly it needed to be cleaned. Ordered the cleaner and oil kit from Amazon and two days later went to work.....
Not a lot going on lately. Thought I had a bad battery or alternator as I was getting low voltage warning and a poor start. Later discovered one of the terminals under the dash that I have my radio connected to, came loose. After tightening it up the voltage warning went away. So that was the only recent scare. Anyway some pics of the clean S4... | ArchivesNovember 2022 CategoriesAll |

 RSS Feed