| Well, the Q5 need some love. It was starting to burn/blow by oil with the occasion PCV P052E00 soft fault. As well we had a oil filter housing gasket leak confirmed by a local repair shop. I'm not sure if oil from the housing or the PCV was the cause, but for the past few month we've noticed a good puff of smoke on aggressive pulls like passing a person. Not mention it was needing a 1qt of oil around every 500-700mi.  So like normal, I went over to my buddy's place and we got this knocked out. Nothing too existing about removing the supercharger, but once we got to the coolant pipe that goes over the passenger side fuel rail, it cracked while taking it out. I had read this was possibility so I had a new one read to replace. Once the runners were all out, we only had one fuel injector come out with them. That go a new set of o-rings. I went around to each intake valve to soaked them with "CRC GDI IVD Intake Valve & Turbo Cleaner". There was some carbon, but it wasn't crazy and of course I forgot to take a picture. By the time we started putting the runners back in I forgot to look back in there to see how well the spray removed the carbon. I also stupidly forgot to suck out all of the chemicals so we had to do a spark plugless crank (fuel pump fused removed as well) to flush it all out. 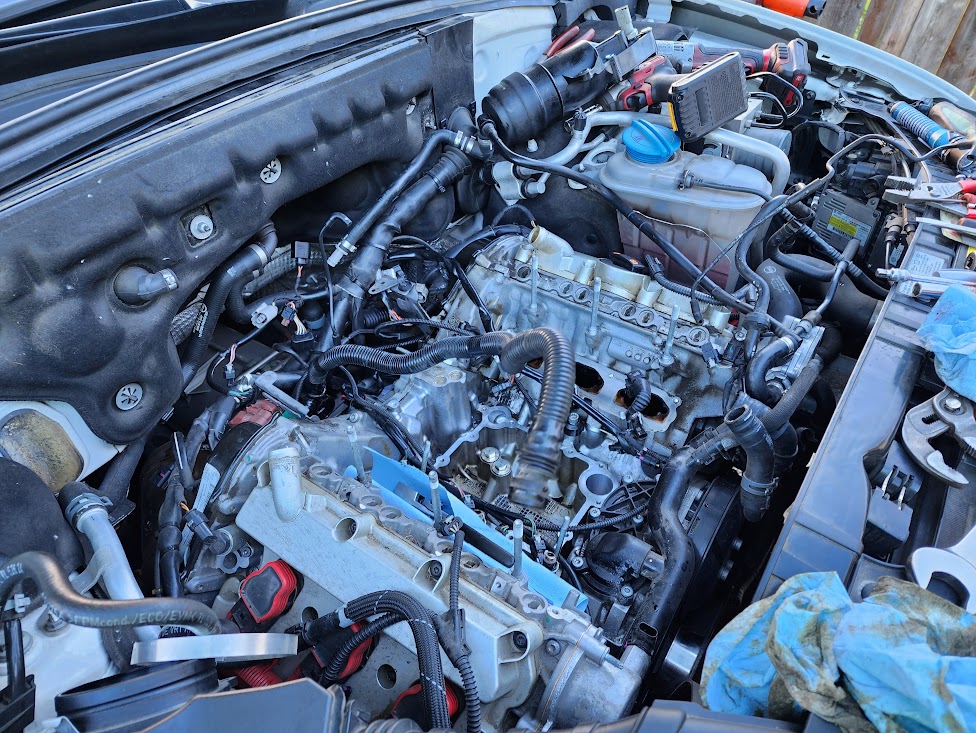 As for the crankcase vent valve everything went in smoothly. I opted for a new "y" shaped breather hose assuming the old one was likely very brittle. Man they took some effort off of ports near the rear coil on each site of the engine.  As for the oil filter housing, that went pretty smoothly as well, it is just in weird position. I had a lot of people say they could remove this housing without removing the supercharger, and I struggle to understand how that is possible. That said, after removing it, the old gasket was certainly flat and hard. Since I replaced the entire housing it came preinstall with a new gasket and oil filter. I think if I ever need to do a tstat or waterpump job I would likely replace the oil filter gasket again just as preventative maintenance. I'm sure my B8.5 S4 is likely due for a new gasket as well.
Last on the list was to get the coolant replaced. We vacuum filled it, but on first crank realized we forgot to plug in one of the fuel injector connectors. So supercharger had to come partially off again to get that connected. We did swap over to the metal 034Motorsports supercharger bleeder screws so getting the air back out was quick. There certainly was a good smoke show with all the cleaner from the intake values once it was running. Reminds me of Seafoam treatments back in my MK3 Jetta VR6 days. The next day after everything was put back together I gave it a fresh oil change with Liqui Moly 5w-40. Gave it a good drive and everything seems to be good. No noticeable performance change, maybe a little more torque down low, but the puff of smoke on hard pulls seems to be gone. Too early to tell if oil consumption had gone down. We have 600mile road trip coming up so we will be testing this. Fingers crossed everything goes well and maybe we can finally get a aftermarket heat exchange and go Stage 2 later next year. Parts List/Links:
2 Comments
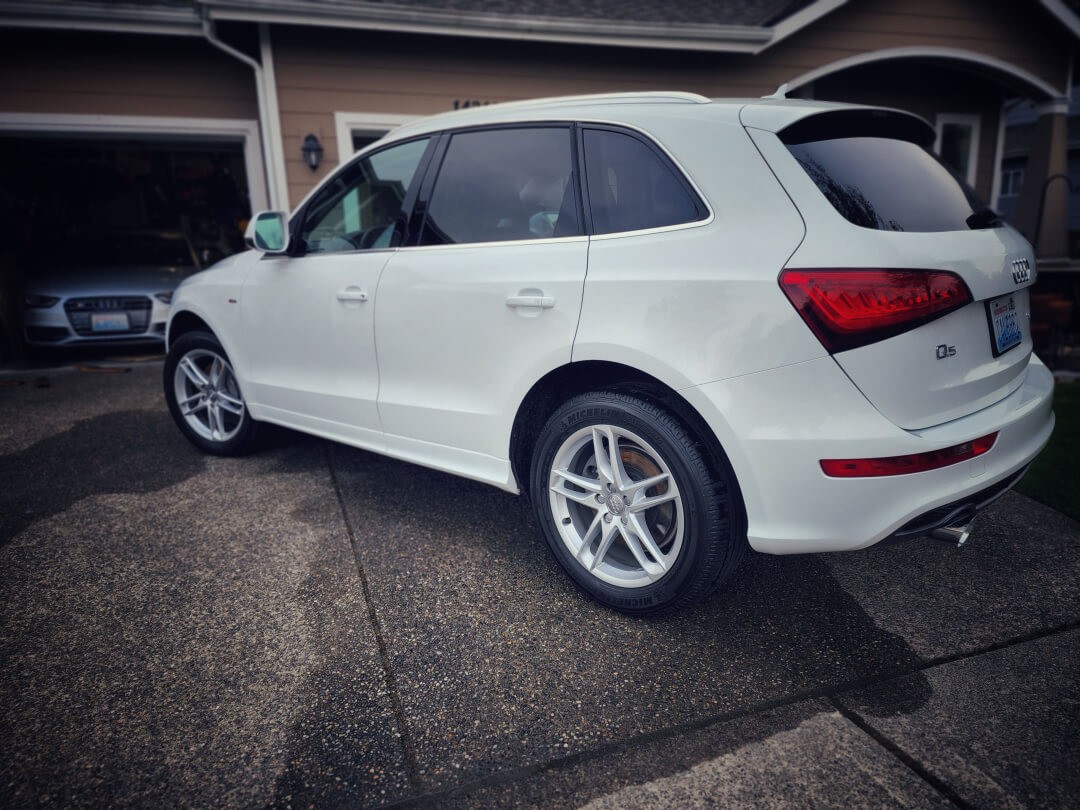
As much as we would love to get some new wheels, dropping $2-3k for tire/wheels is a little out of budget at this point. That said the meaty look of the 19 has grown on me and the ride quality is still very good while sporty... so, to get the flush look everyone loves, I went with 15mm front and 20mm spacers in the rear. I think they are about as perfectly flush as you can get. The only problem I can see here is that if I ever want to go with a wider 255 tire vs the current 235, I'm likely going to poke a little with the current setup. In that case I likely move the 15mm to the rear and get a set of 10mm for the front. In any case I'm super happy with the look right now. And lets be honest here, the 235 width tires while narrow is going to get the best MPGs.
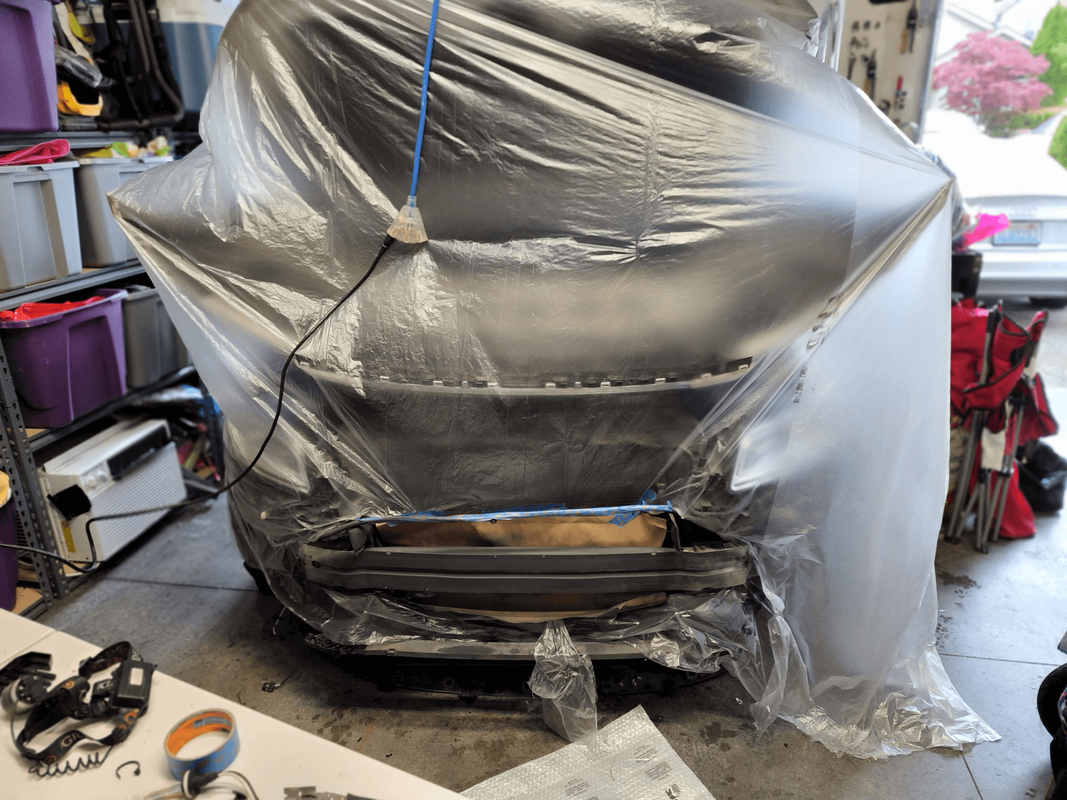
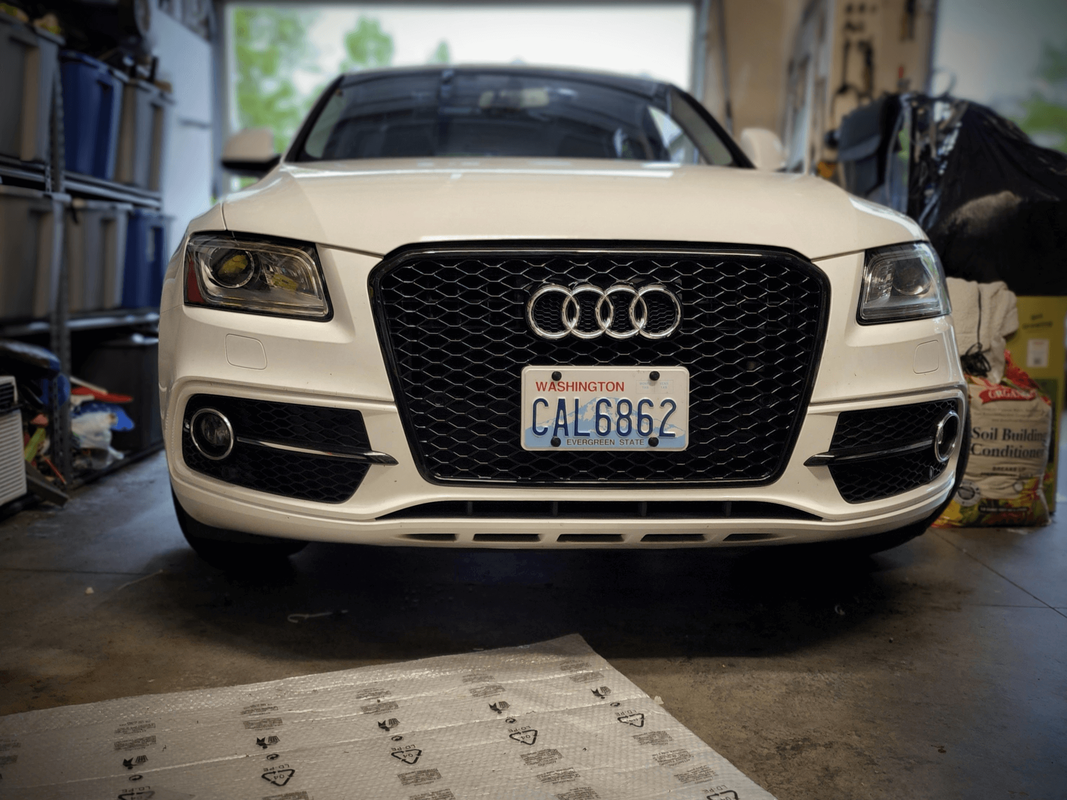
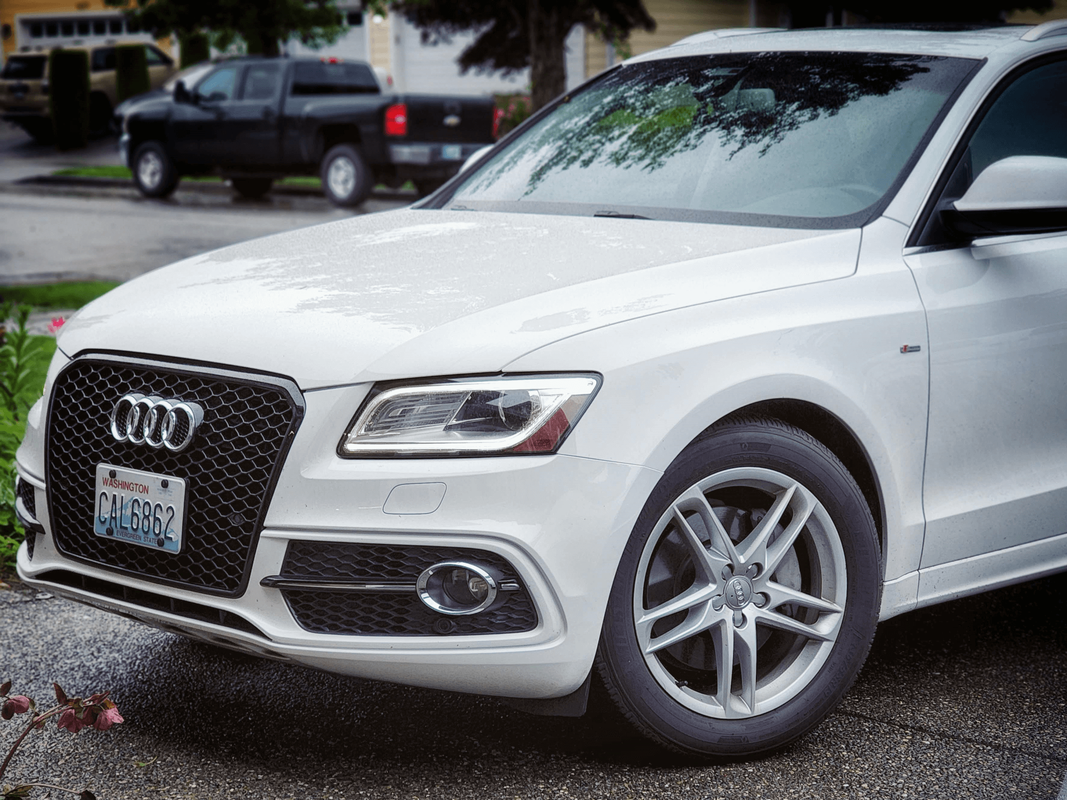
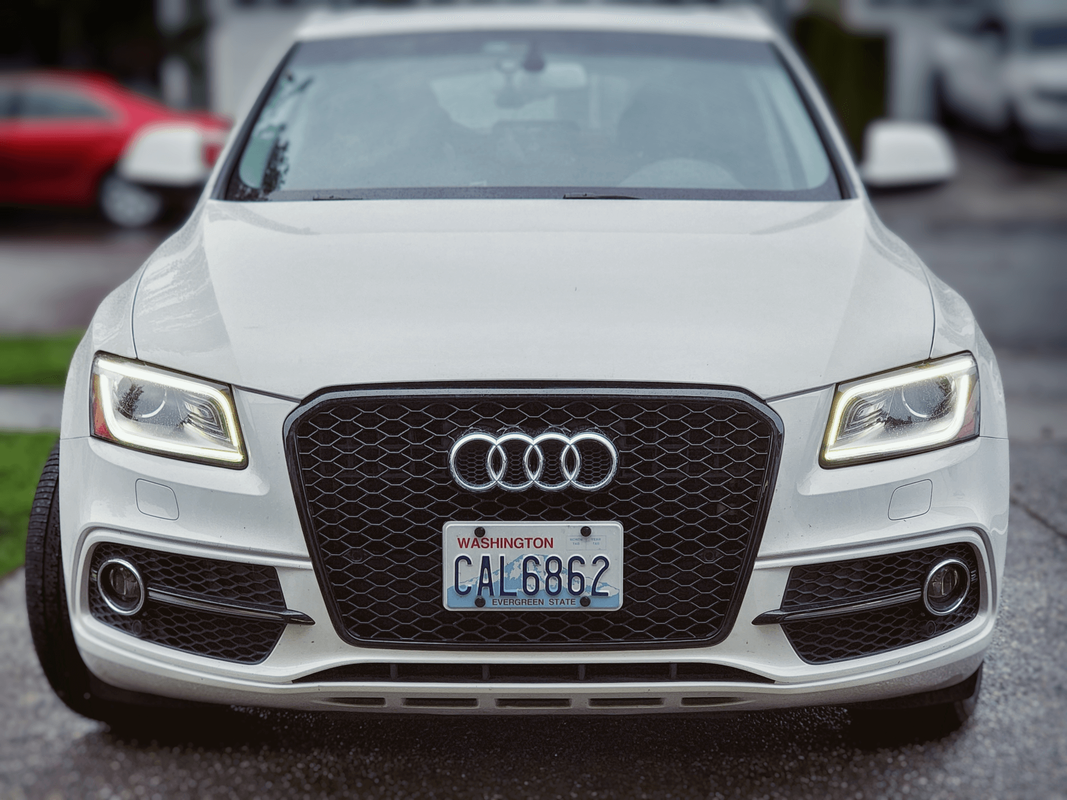
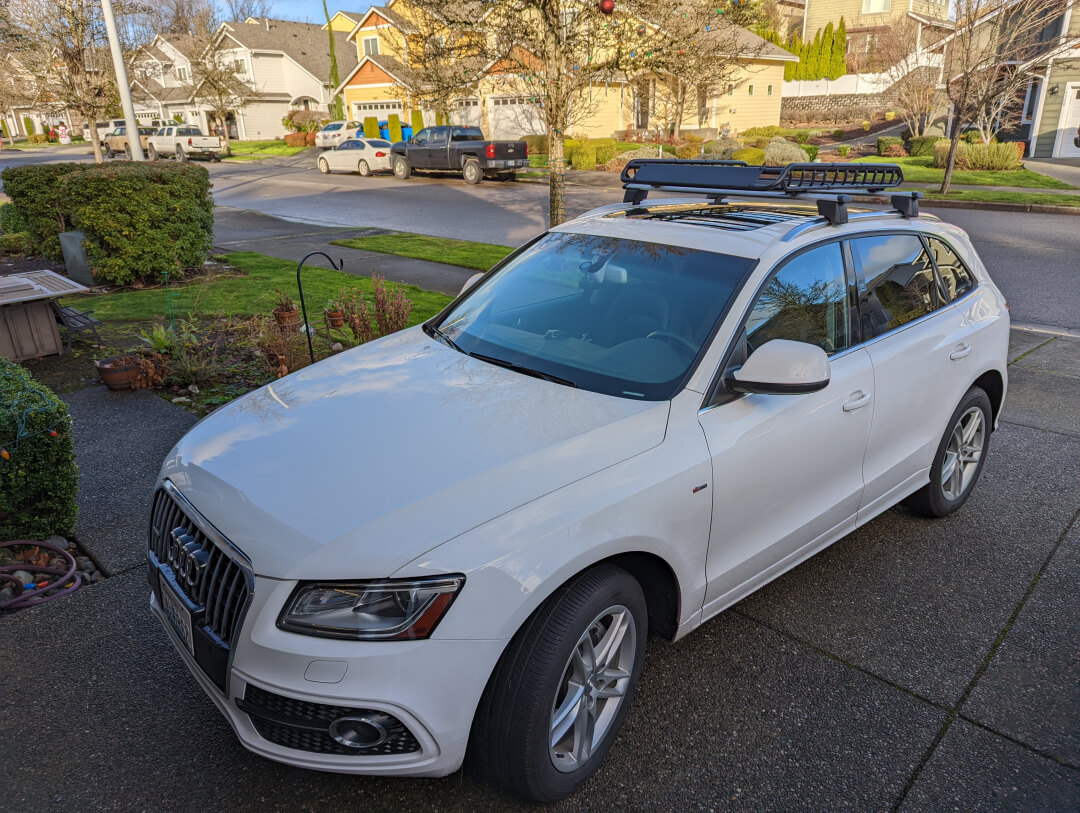
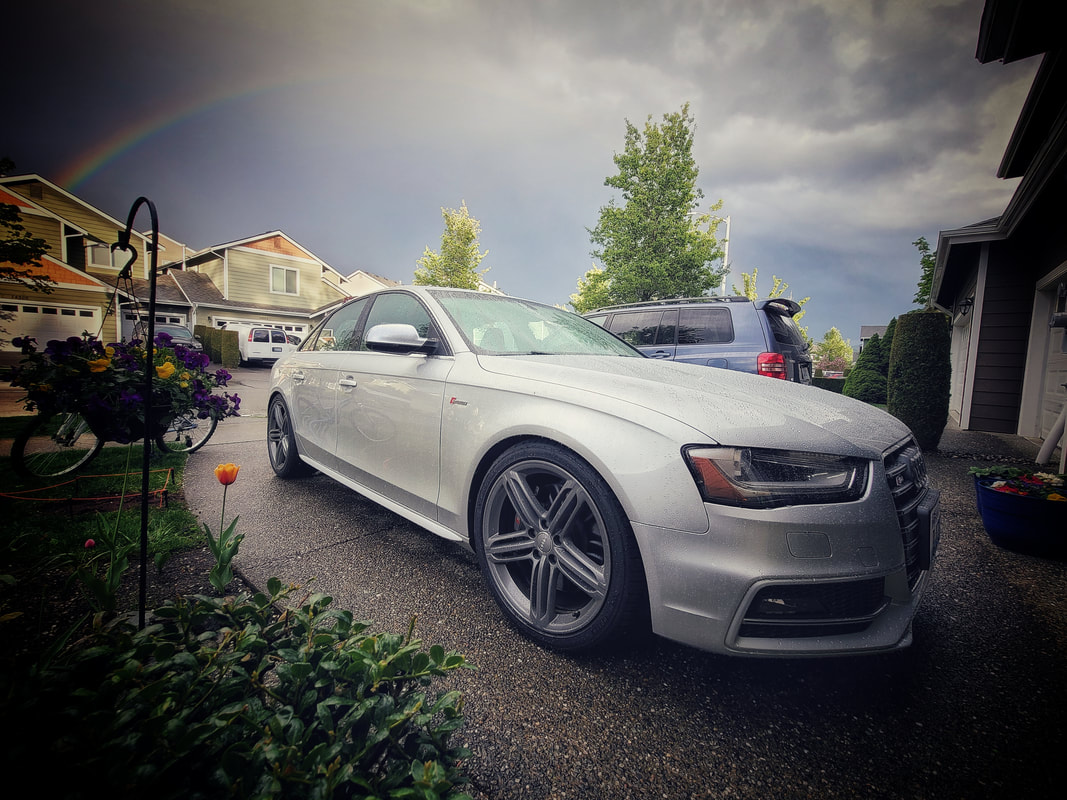
Don't worry, I'm not adding the RSQ5 badge, but I did install the grill and it looks amazing! Yes I did get it from eBay, here is the link: https://www.ebay.com/itm/403301463231 (no idea how long the link will be valid) I think we've all seen these grill at this point so I'm no where near the first to install it, but I kept hearing people say how hard the install was. I'm just going to put that too rest for at lease those with Q5's... this was NOT hard. Yes it took me about 4-5hrs to do, but I was taking my sweet time and just being careful. Now maybe it is harder for the SQ5 crowd as they have a slightly different bumper, but again for Q5 owners don't be scared to give this a try. Removing the bumper was the hardest thing, and still, that was very easy to do. As for the trimming of the RSQ5 grill, the only thing I had to trim was the lower portion of the grill as shown below: 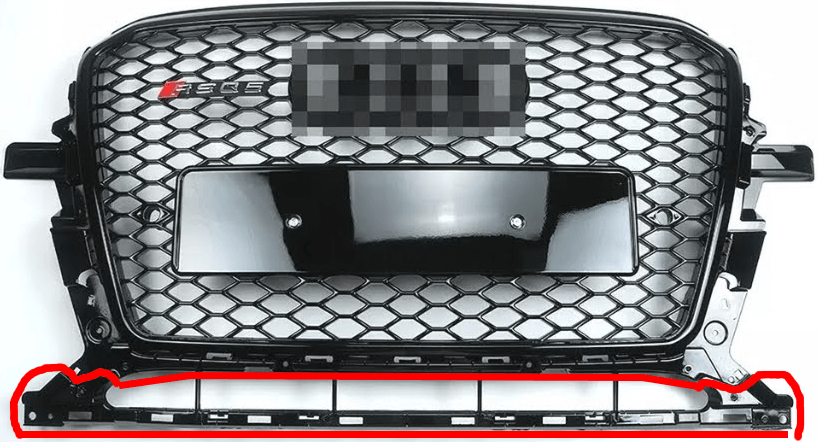 What helped me was to have the new grill lay on top of the old grill so I could see what needed to be trimmed. I think I spent maybe 10mins using the dremel to make quick work of everything. A bit of advice, a lower speed for dremeling plastic is better to avoid melting it. I will say that my grill didn't have dedicated mounts for the euro plate. I know other versions of this grill does, but this one didn't. That alone likely saved my a few hours of work. This grill included "U" brackets for the plate holder which was useful later on in the project. While that was happening I was laying down coats of flat black paint over the crash bar. I may have gone a little crazy to mask off the front of the car, but since the Q5 is white, you have to be cautious. I likely should have put some primer down first over the crash bar, but honestly I got lazy. If I redo this I would likely go with a bed liner type of paint at it is more durable, you just need to apply it in warmer weather. At this point the we are encountering one of the coolest wettest springs in a long time. I was cheating a little using a heat gun at the lowest temp to keep the drying process relatively quick. Putting the bumper back on with the new grill was pretty straight forward. Trying to hide the parking sensor wires was kind of impossible without cutting the wire up to make them run outside and around the grill. Since I wasn't going to do that (might be a future project), my only option was to have them go straight back and go over the top lip of the crash bar. While I was there I add a few layers of electrical tape around the harness ends for the parking sensors to both hide the wires better and offer a little more shielding from the elements as they are far more exposed with this setup. Obviously this pictures wasn't taken in direct sun light, but the wiring is still pretty hidden.  Sadly my last step was getting the front license plate installed. It is required in my state, so it is a must. As I hate the look of a US spec license plate on a euro plate holder, I went with this from Amazon (https://amzn.to/3xncdFX) (affiliate link). What I liked best about it was that there was a lot of different mounting holes to give me a lot of flexibility to mounting it properly. I reused the bolt and "U" like bracket that came with the grill's euro plate holder for the new US spec plate holder. As well added 4 black zip-ties in each corner to keep it solid on the grill (sorry forgot to take pics of that portion of the install). And for the final result we get this.... The wife loves the look of her car, so I'm happy. What's next with the Q5 and is the S4 still around? Yes the S4 is still around, just hanging out in the garage a lot more than normal (still working from home). I got a few little drivetrain rattles I need to look into, but other than that it seem running good. Hopefully some day we will go dual pulley. As for now the next Q5 projects are little unknown. We might play around with a different color for the stock wheels. While I would love to get some 20's as they keep that meaty tire look (21in are just too big in my opinion), I'm just not sure I want to drop the money for new wheels and tires just yet. I certainly will be adding some wheel spacers, just not sure if we want to go with the super flush 15mm (front) 20mm (rear) setup or something a little less like a 10/15mm. Again I like the OEM+ look vs the "hey look at me I'm super modified look". Any future performance upgrades are pause at the moment as I chase down a oil leak. Seems to only leak while the car is running and it collecting right around the oil pan. A mechanic buddy of my already checked the oil filter housing and upper timing chain covers (no leaks), so the most common places seem to be out. The location of the oil doesn't always tell the true story as air flow moves it around. That said it just seems like the oil pan is the likely source as it seems to be sweating oil, but there is no area where it is dripping. Hopefully it is just bad drain plug, so I got a new one with proper copper crush washer ready to install for the next oil change. If that doesn't help, either the oil pan seal is the problem, or maybe we got a PCV issue and it is just collecting down there. It being a car with over 100k+ in miles I'm sure the PCV is near the end of it's life. Anyway, I'll start with the most basic fixes and go from there. Once the oil leak is resolved, next on the list would be a MercRacing heat exchanger and a 207mm crank pulley. This allow us to jump from a Stage1 to Stage 2 dual pulley without touching the supercharger pulley. I don't want to deal with belt slip and this is honestly way easier to install than crank pulley. Supercharger pullies are hard to install, but why bother renting the tool and doing the oven dance of heating pulley and racing to get it installed. I like to think I'm older and wiser now... Maybe ;) It was a long cold raining spring Pacific Northwest day, but all front lower/upper controls arms are installed, plus JHM lowering springs for all four corners. The wife was worried it would be too much of a drop but after the first drive, I quickly got the seal of approval from her. No rubbing, no issues with speed bump, just a good drop. We made sure to trim the bump stops and preload the control arms to account for the drop. You could hear the bushing snap back into place once each corned was loaded. It really shows you how important that process is. All the clicks and pops from the old failed ball joints and torn control arms bushings is a thing of the past. Car feel tight, sporty, and free of broken suspension sounds. The best I can compare it too is how the SQ5 has a firmer ride. Nothing harsh, but just sporty. Shockingly the car still drives perfectly straight, but we still plan on doing a alignment. As for the look, I think it is perfect! I didn't want to slam the Q5, but really to go for a OEM+ plus look. On the upside, the new 2in drop is going to make cleaning the roof and using the roof rack that much easier for me. I'm 6ft tall, but it seem like the center of the roof was just a few inches of out my reach.... not any more! You got to be excited about the little stuff. Wheels? Well, I still got a flush kit wheel spacer on order which should be here in a few weeks to complete the look. Honestly I kind of like the stock wheels, but if we were going to do something different we wouldn't go bigger than 20in as I like the meaty tire look. Not to mention it keep the ride comfortable. For now I'm just so happy with how it turned out. We will have to see how long these stock struts hold with 100k+ miles on them. Fingers crossed! All parts installed:
Well my plan was originally to just do some H&R lowering spring, but the more pictures I saw of people with that setup the more I didn't like it. It just wasn't enough to set it a part from the OEM ride height. While browsing around eBay I noticed JHM was selling their 2" lowering spring kit for $149USD. Immediately I thought this was a scam, but after contacting JHM via their official store front, it was real. That said, that was immediately purchased.
While I was looking at my shocks to make sure they weren't leaking, I noticed a problem that I kind of expected. I heard some snaps and pops when turning the Q5 at low speeds. Sure enough every single control arm bushing was torn. As I know this platform loves to eat control arm bushing, but the fact they were all torn makes me thing they have been serviced in the past and were not properly preloaded before torqued down. Oh well, I ordered a complete upper and lower set for the front from FCP euro so I had the lifetime warranty.
Hopefully in a couple of weeks the car will be looking way better than this...  This is likely the easiest, fastest, and cheapest install you can do on a modern Audi. I did the same on the B8.5 S4 and it was just as simple for the Q5, maybe even easier as I didn't need to jack up the car.
All you need is the following
For me what I notice in ever car I've installed this in, is that the transmission just shifts smoother. There is less of a "jerk" or rubber band snap like feeling between gear changes. All the play is just gone and it make the car feel new. I highly recommend it. The Q5 is getting a little taste of the "R" line with a flat bottom steering wheel from a 2014 RS5. I bought it from a local guy taken from his parts car. He sold it to me for $600 which likely the best deal out there for both a steering wheel and airbag. It is nice to see some people out in the world that sell at a fair price and don't pass along the "Audi Tax" on everything. That said, I wasted no time, picked it up, and got this installed. As a word of advice, you do need a Triple Square socket set to get the steering wheel removed once the airbag it out of the way. As for the airbag it is either bolted behind the steering wheel or snaps in. For my case both the existing airbag and the new one were snap style. I found it very helpful to use a borescope with a pick to unsnap each side. There are many Youtube videos out there that go over it. As for code the paddle shifters, I used retrofit option in OBDEleven, which cost 10 credits (you can get free credits watching ads) and got that enabled in about 10 seconds. Likely took about 1 hour to remove the old steering wheel and install the new one. I can't remember doing back to back installs on a Audi (exhaust and this steering wheel) where everything just went smoothly. (knock on wood) My wife isn't the biggest fan of the perforated which I can get, but it does have a nicer feel vs the solid leather. Not to mention, as a bigger guy, the flat bottom just gives so much more clearance to get in and out of the car without your legs hitting the steering wheel. Lastly, it is so nice to have the same paddle shifters like my B8.5 S4. You can have the same fun drop down a few gears to making a pass on the highway. As for the RS5 logo, likely going to just lay some piano black vinyl over it to make it less noticeable. I found a few places that want $20 for a new sticker which doesn't really seem worth it. We will see.... You can find my existing steering wheel for sale here: https://www.facebook.com/marketplace/item/223996693257818/ 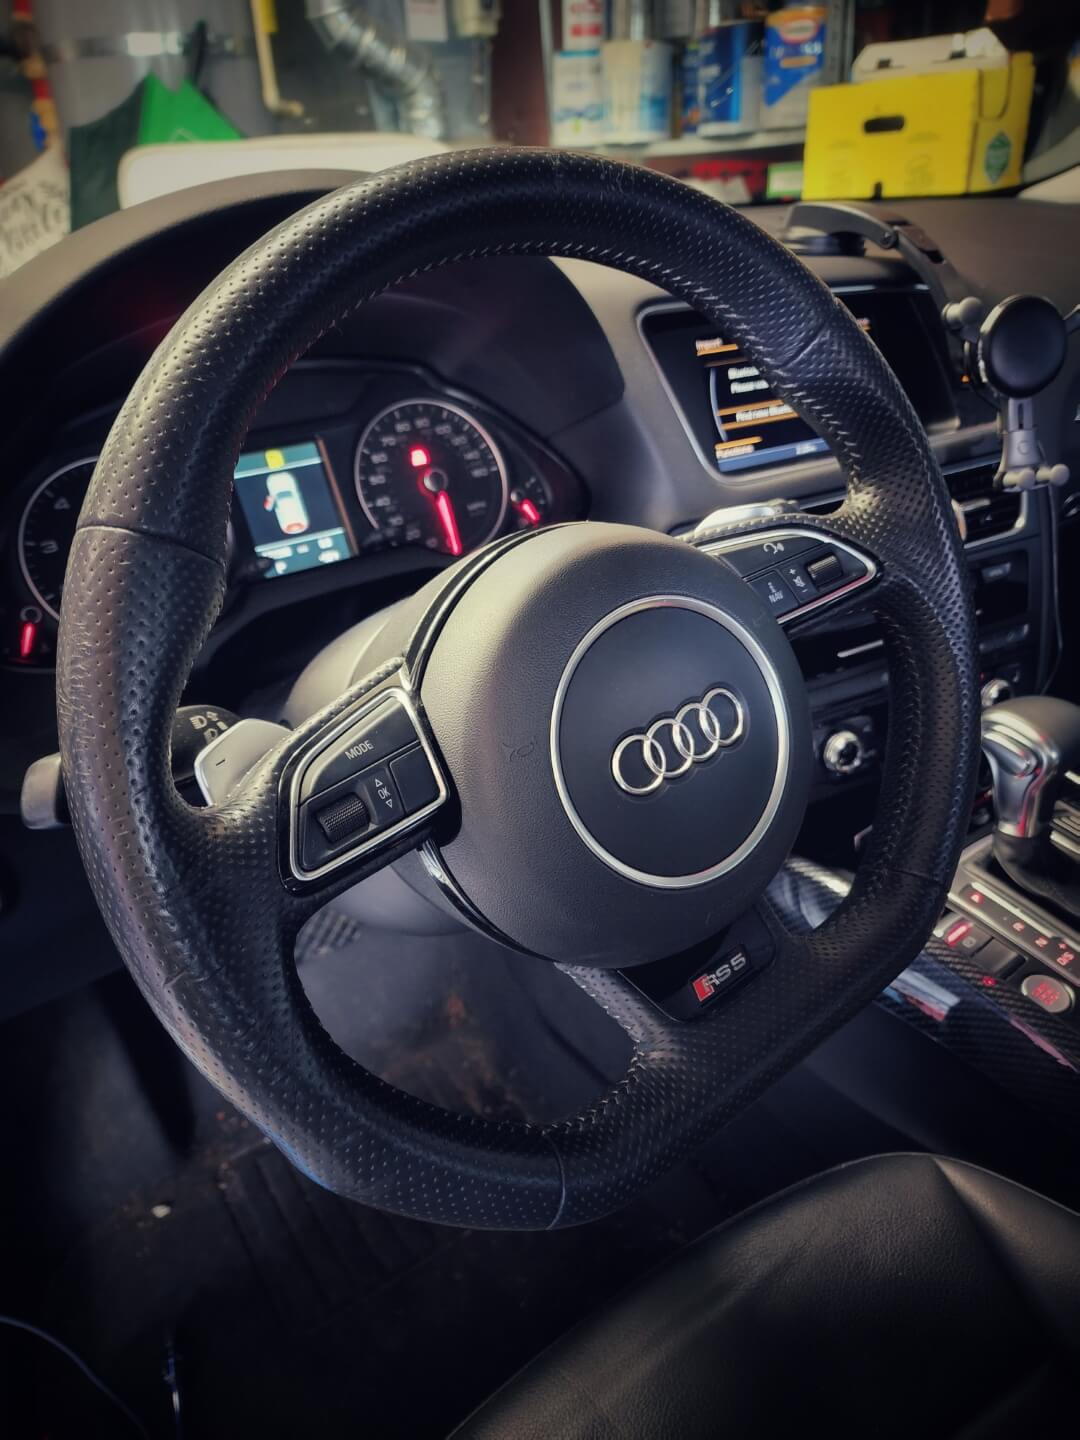 Automotive detailing is my happy place... I know it's weird, but its calming for me... Put on the some music, get out all the supplies, and start cleaning. At the end you are tired and sore, but the results make it worth it. That said, I'm been putting this off because the previous owner did a terrible job and left dried polish/wax in hard to reach corners like between the door handles and body of the car, and in-between the letters in the emblem. Rather than taking the time to tape off areas you don't want to get polish/wax on, some people just go crazy every where. Oh well, looking way way better now. Up next, looking for a SQ5 flat bottom steering wheel, 034 Motorsports lowering springs, and the RSQ5 front grill. I'm always looking for new wheels, but at the same time, I'm going to loose that comfort you get with the 19's if you go bigger. Don't think I would do anything bigger than 20's as I like that meaty look vs the super low profile tire. My wash method: We only put maybe 50miles on it, so this is just a short initial sample of how it sounds. For best results listen with headphones. The last time I did a cat-back exhaust install was back in my MK3 Jetta VR6 days, 10+ years ago. I remember that being a extremely frustrating experience with almost everything going wrong. Didn't have the right tools, clamps broke, saw blade respectively broke (this was a hand saw)... and worst, I was young and inexperienced. Thankfully this AWE Touring kit was a super easy to install, and I've gotten wiser with ago... maybe. I will say using some silicone spray with exhaust hanger removal pliers made the process of removing stock exhaust stupid easy. The stock exhaust was off in less than 20mins. I did used penetrating oil on the down pipe clamps, waited 15mins and remove them no problem while the exhaust was still warm. Figured I could use the existing heat to my advantage to break them loose and it worked great. One thing to remember when removing the stock exhaust is to keep the stock down pipes from sagging if you plan on using them. I found using a floor jack and some wood keep them in place no issue. If the down pipes do sag they can tear and leak.
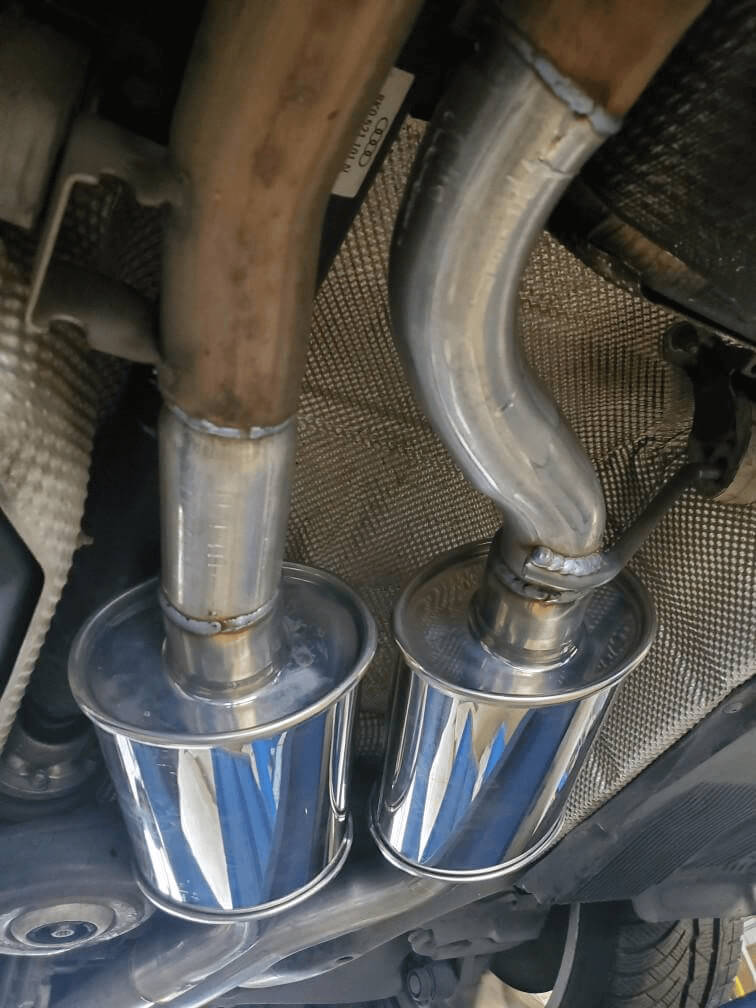
Installing the actually AWE system was pretty easy. You don't want to fully tighten any of the clamps just enough to keep the pipes all loosely connected. From that point it was just about aligning everything. I likely spent about 50% of the time getting the rear mufflers to be parallel with the ground and all the upstream pipes aligned properly. I did run into one problem where I didn't have a deep 16mm impact socket for the clamps, but Harbor Freight saved me Lastly, I had the wife decide how far out we wanted the exhaust tips to poke and we were all good to go. I think in total it about an 2.5-3hr job and this was just putting the rear end up on ramps to raise the car. I'm sure this would be even faster on a lift. More videos to come when the exhaust has at least 400-500 miles on it. I thought I had another month to go, but FedEx made a surprise delivery today.... 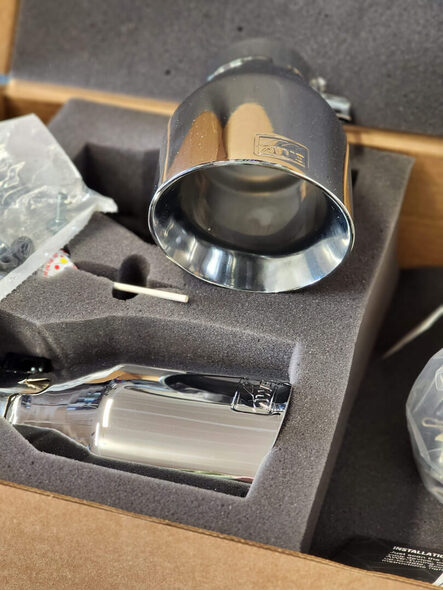 Yep, we went with the AWE Tuning setup for the wife's Q5 3.0T. Ceder from Rowe Tech in Portland, OR hooked me up with a great deal and with the added bonus of no sales tax because Oregon doesn't have any... it was meant to be. I just finished going over the entire AWE Tuning setup with Blue Magic Polish as it also has a sealant in it. I'm not too worried about rust as salt is not really used in my area, I just want the exhaust looking good for a long as we own the Q5. The muffler really do pop now that they are polished. As for the exhaust tips, I did two coats of CarPro CQuartz Dlux Ceramic Coating. As it is made to withstand high temps, I'm sure it will last a solid year or so. I've used CarPro Ceramic coating on my S4 and after 3 years it is still holding up. I hope to get this system all installed before the end the week. It's funny the last time I bought and install a cat-back system was in my MK3 Jetta VR6 days over 10 years ago. Man times fly by. 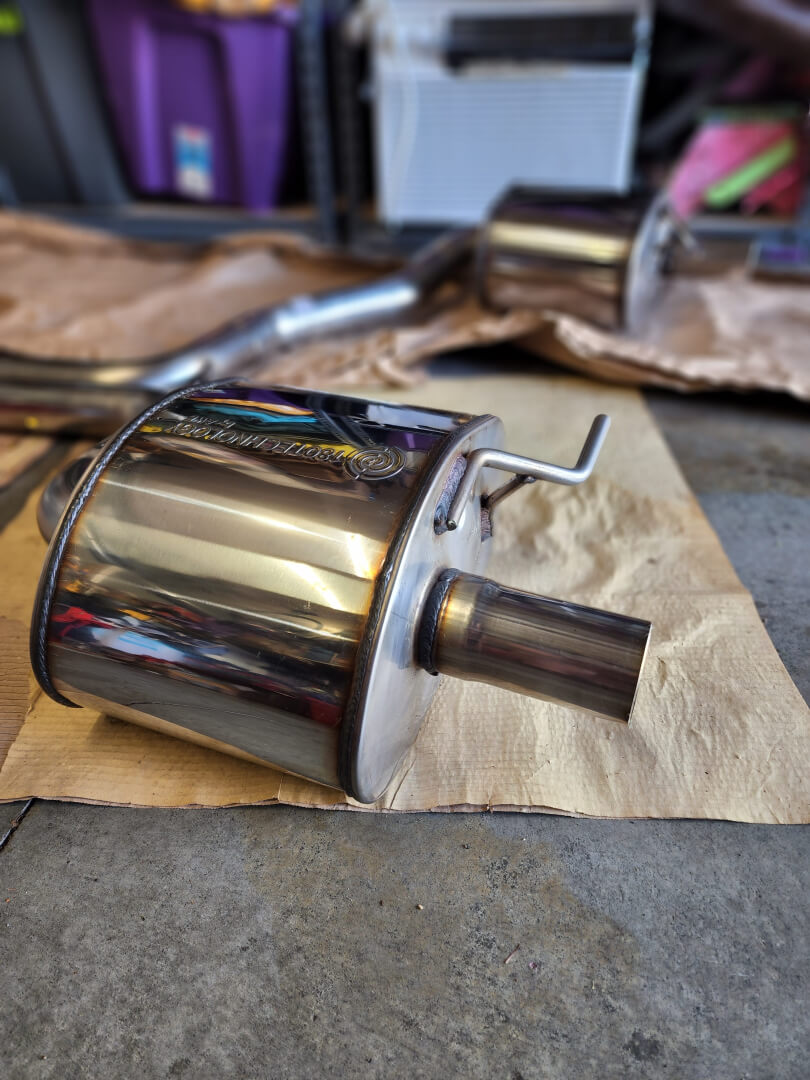 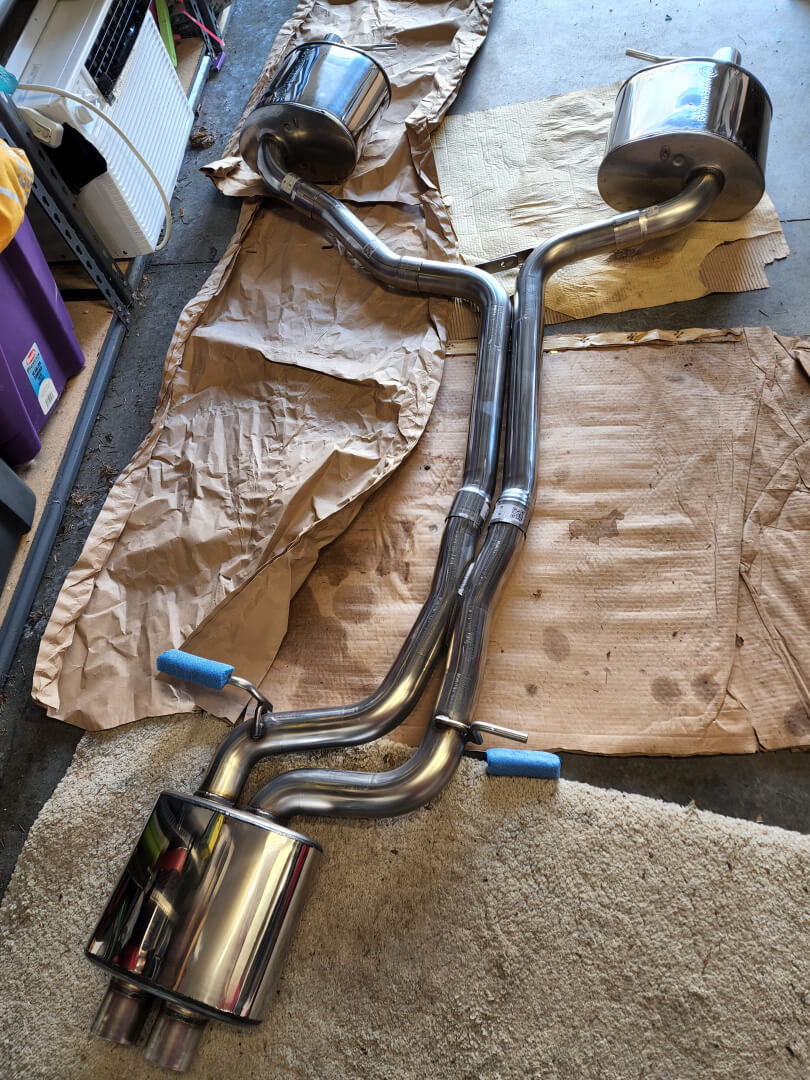 Well I'm going to be honest, the custom exhaust on the Q5 isn't what we are after. While it has gotten louder and the 4in tips look so much better, it just doesn't have the volume plus tone we wanted. And I know the original idea include a xpipe to replace the center muffler, but I'm a little annoyed by the very slight drone this setup has introduced when you are going up hill doing 65mph+ with just the rear mufflers replaced. I'm going to be honest, this is a very light drone, and most people likely would not even classify it as such, but as this is the family car it just kind of annoys me. Where we live just happens to be hilly and we travel at that speed for a good distance to and from work. My wife isn't bothered by it at all, but I'm the guy that will stop a road trip if something is rattling in the trunk 5mins from our destination. What I will say is that this setup give the Q5 a nice presence with the low refine growl that the stock very much lacked but really only at idle. No rasp, but it just still sounds too stock'ish at wot. If I'm going to have a little drone, I want the volume and tone that make you happy with the sound of the car. This setup just leave me feeling like it is missing something. And I'm sure the xpipe in the center muffler would fix it, but I just don't want to do any more customizations as I'm guessing with my money. I've done enough tweaking with exhaust on the S4, so I rather go with a known system that has tons of feedback and sound samples to hear.
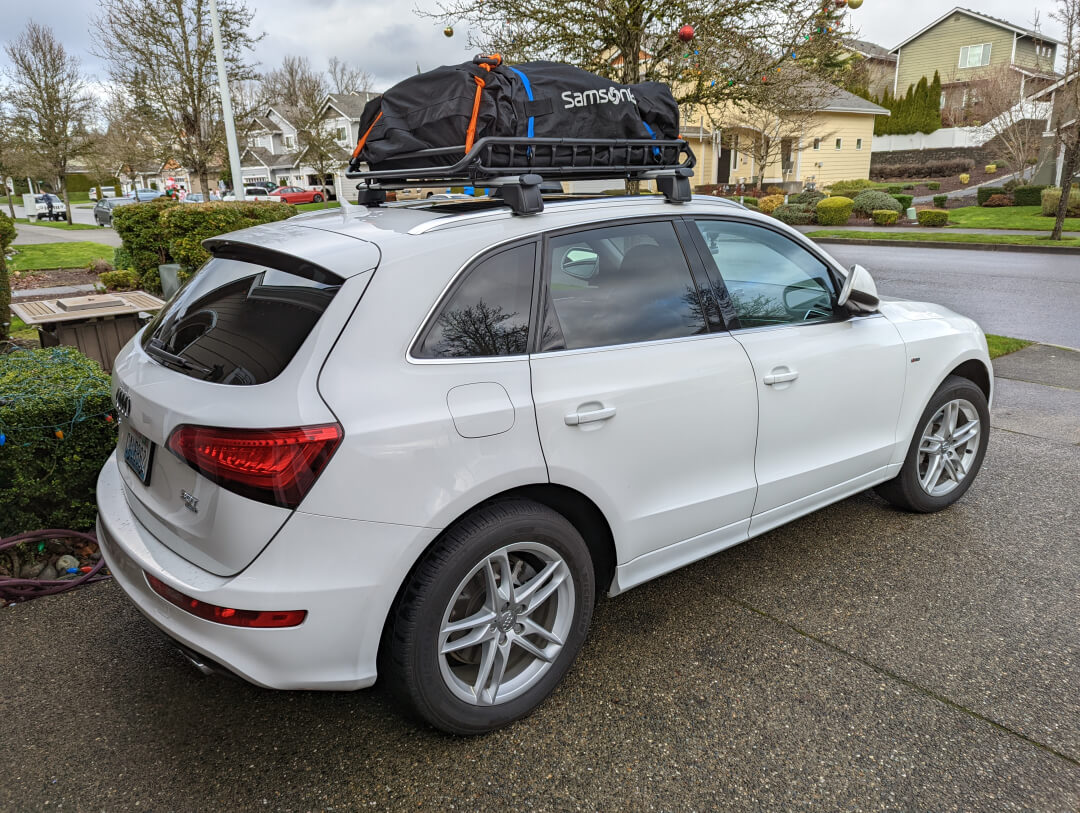
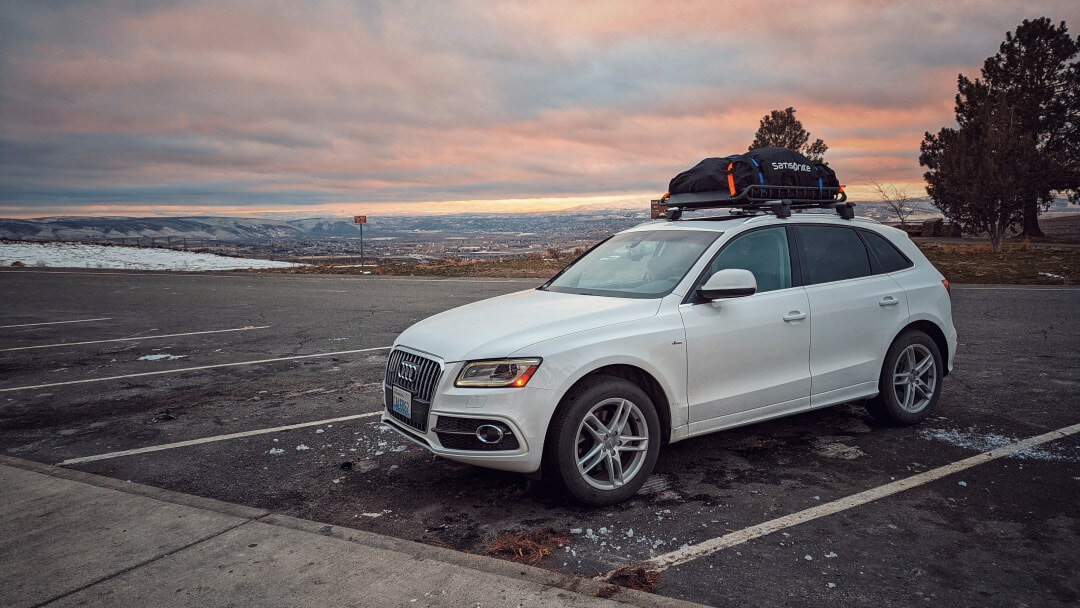
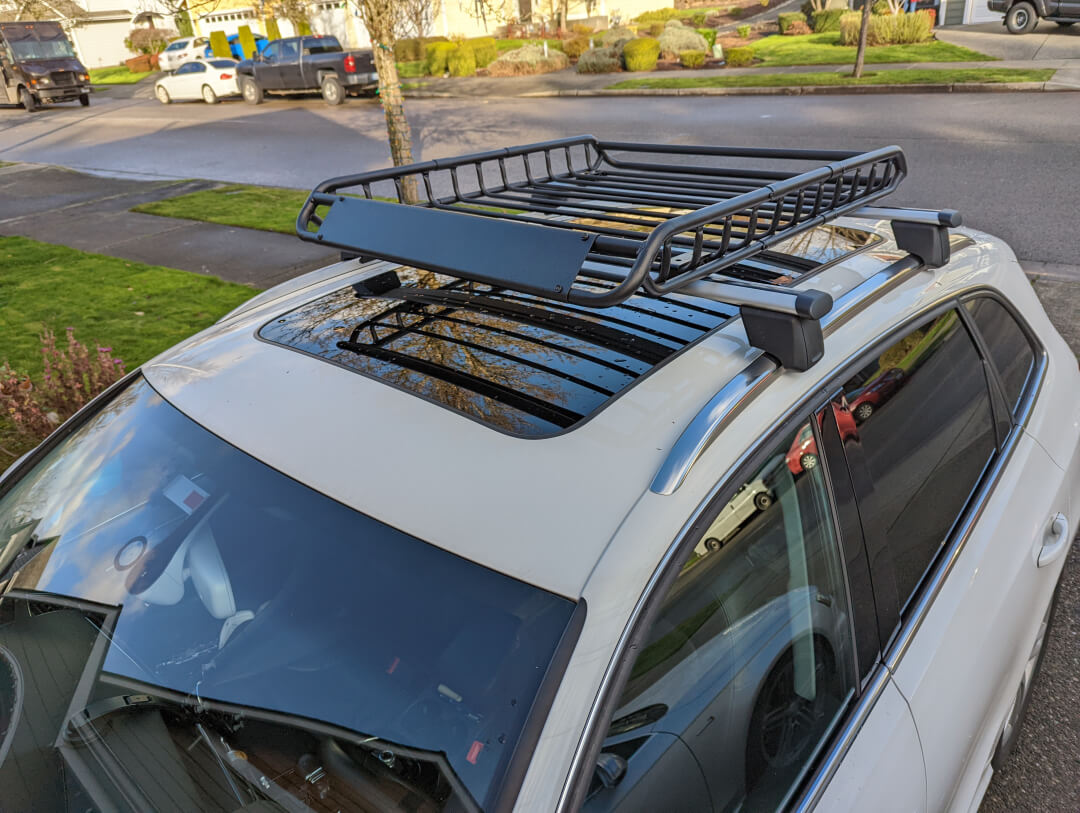
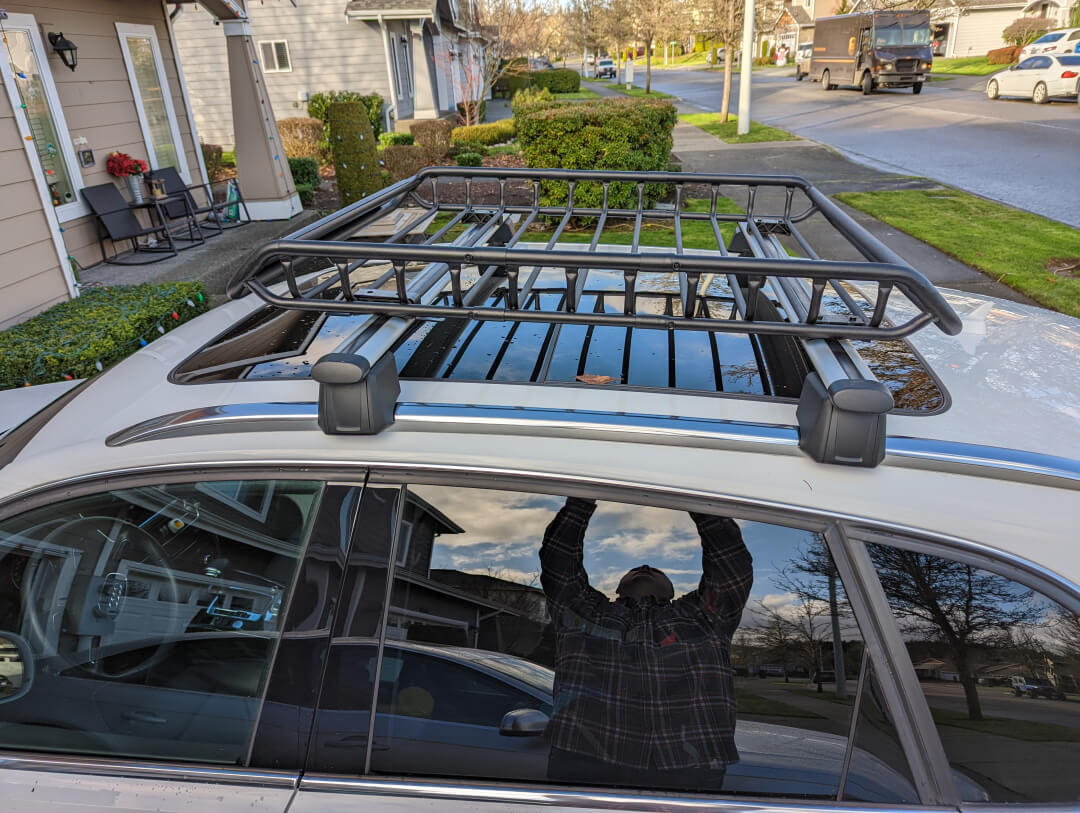
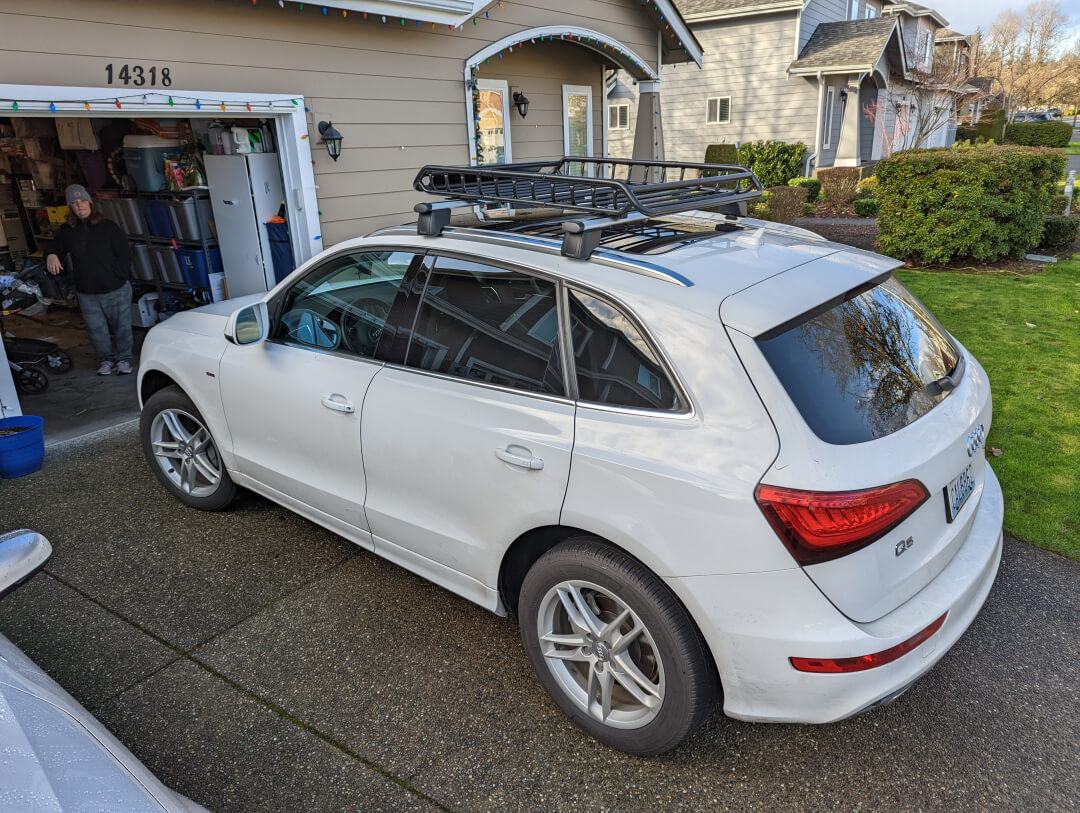
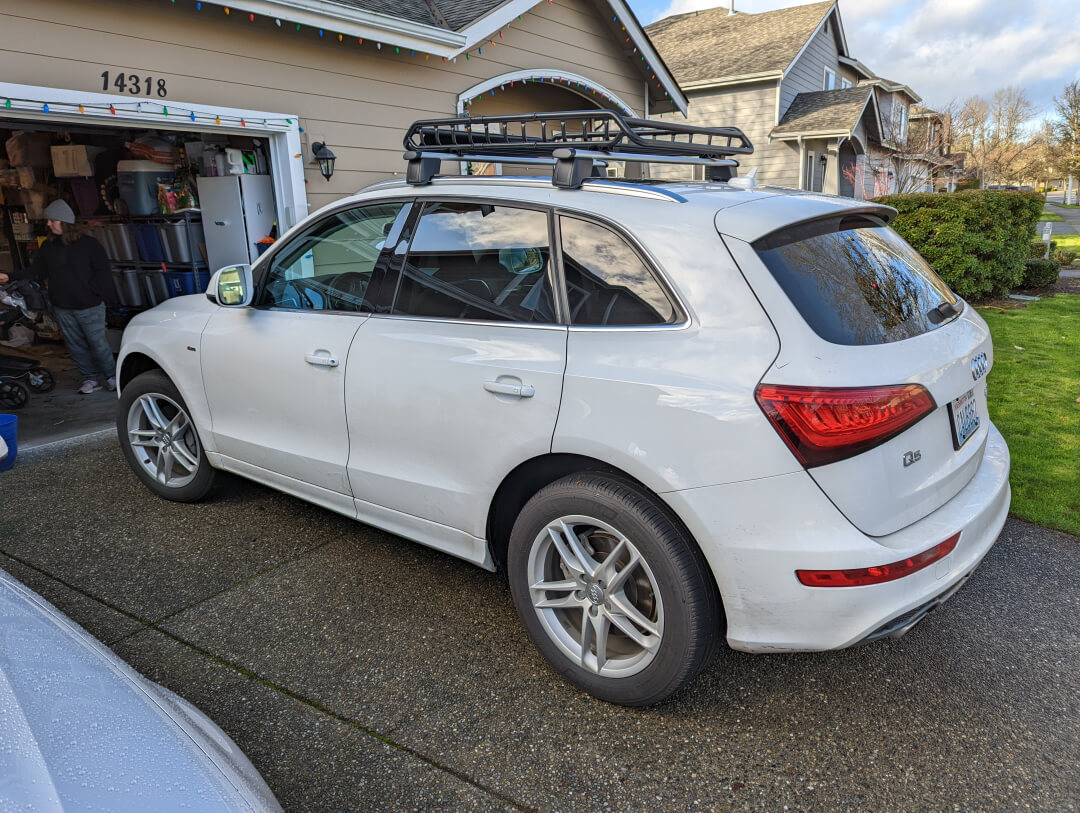
My options are going Milltek and get a SQ5 diffuser or go with a AWE Tuning setup without changing the diffuser. Either way, it's expensive, but I know drone won't be a issue, but if it is, at least I know what the tone and volume will be like. There is no surprise with those setups as you got tons of examples to listen from. The wife likes the quad exhaust option if we went Milltek, while I like the more stealthy dual tip. That said, we found a dealer selling a new kit at a discount. As it is built to order we got to wait until mid April before it ships. For now you all will just have to wait and see which one we went with. The rear mufflers have been replaced with MagnaFlow 11235 and add a pair of 4in Jones JST139 exhaust tips. The tips alone make the rear end look so much better. As for the sound/volume, the tone is lower now (wear headphones when you watch), but the exhaust is not very much louder. Take note the new rear mufflers are only a day old and the sound will settle more as we drive it. I'll try to do another update in 3-4 weeks if there is any significate change. Very possible we will do a xpipe to replace the center muffler, but likely another month off before that happens. Since the exhaust tips are pretty trashed (yes that's my excuse ;), I'm going to try something a little less common when it comes to custom exhaust for the B8.5 Audi Q5 3.0t. Most, like what I've done on my S4, replace the front "baby" resonators and straight pipe the the center muffler (or in reverse order), while keeping the stock rear muffler in place. This time around for the Q5 I'm going to leave the front and center exhaust components alone and and will replace the rear mufflers and with MagnaFlow 11235 and add a pair of 4in Jones JST139 exhaust tips. This was inspired from this video https://youtu.be/DTHTNY8IhFc except I don't plan on adding the xpipe right now. I'm sure just replacing the rear mufflers will increase the volume and change the exhaust note to a lower tone, but I'm not going after a "look at me loud". The wife wants a sporty sound, but no drone, so this should give the best of both worlds. If it is still too quiet, we can always add a xpipe to replace the center muffler at a later time. At this point I just need to book the appointment with our exhaust shop and get it installed. As the tips are polished stainless steal I'm going to polish them more and ceramic coat them so they stay super clean and protected for a long time. Hopefully we will have a update and some sound clips before the end of the month. 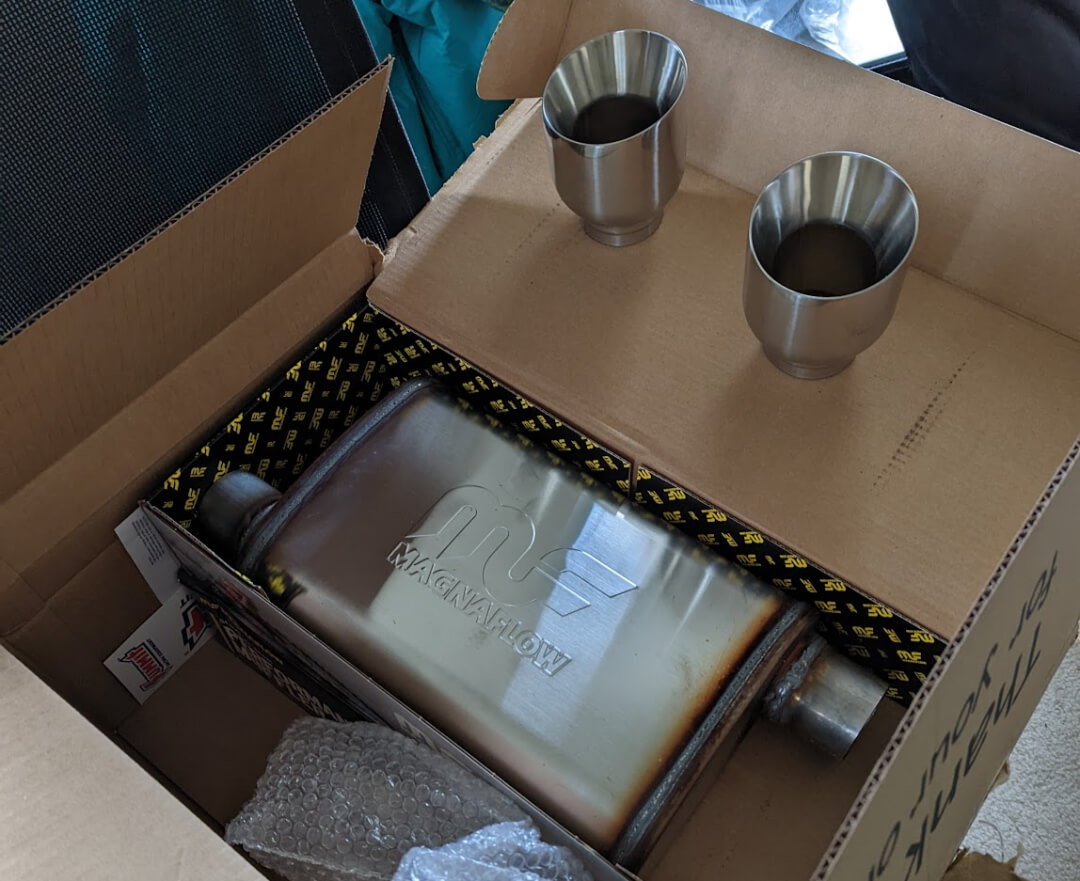 Our family of four made our Q5 first road trip over this holiday weekend. It was about 600 miles in total, and the Q5 ran like a champ. I was nervous with the Michelin all season tires (no sure of the exact spec) as I had no idea how they would do in the snow, but they did great! Luckily we never ran into any ice, but with compact snow, they felt very solid. With the roof rack, full car, and the mountain passes, we still averaged in the upper 20's mpg, which is absolutely impressive for how loaded we had the Q5. Likely the EPL Stage 1 tune helped with MPG's. As much as I would like to get a clean looking hard shell roof cargo box, I'm not going to drop that kind of money for something I'll used 1-3 times a year. Second, I already have a cargo bag that is waterproof and will work just fine. The cargo bag worked great for our previous Toyota Highlander as I would just sit it on the roof directly... but the Q5's roof is nearly all glass roof, and I'm not going to have this bag get close to the roof and the problematic sun roof rails. We did got OEM roof racks with the Q5 so a roof basket seemed to be the best choice.
Below are the test fitting pictures I took post painting just to see how it turned out. The "u" bracket that goes under the roof rack rails is not installed so keep that in mind. That said, for under $150, I'm happy with how it turned out and believe it will work great. When we get it all loaded up, I'll make sure to take a few more pictures and update this post. - Amazon affiliate links were used in this post
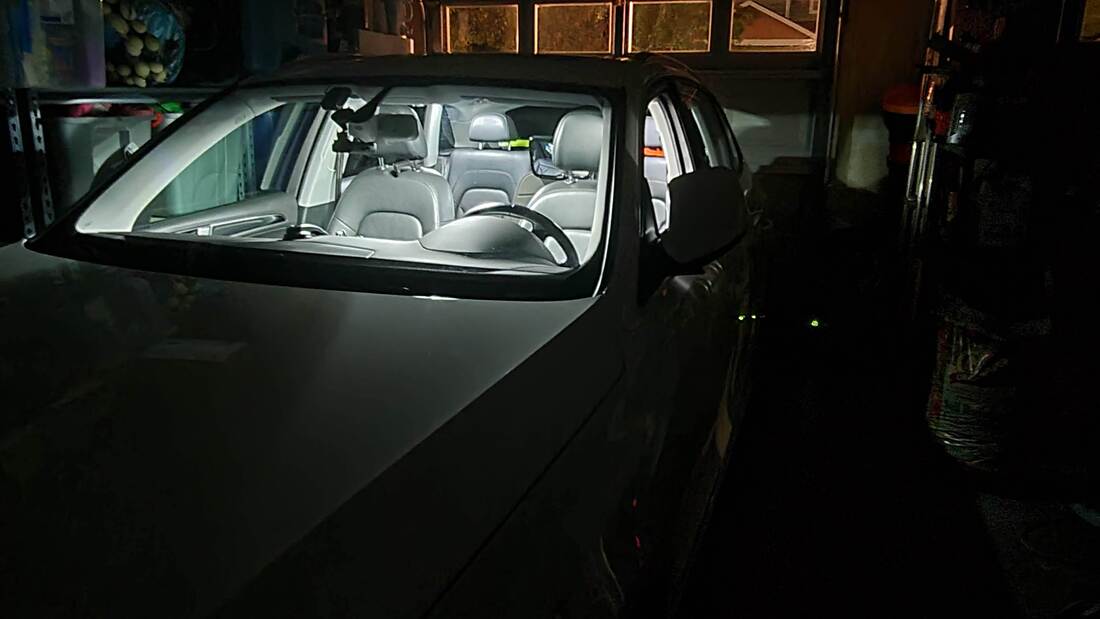
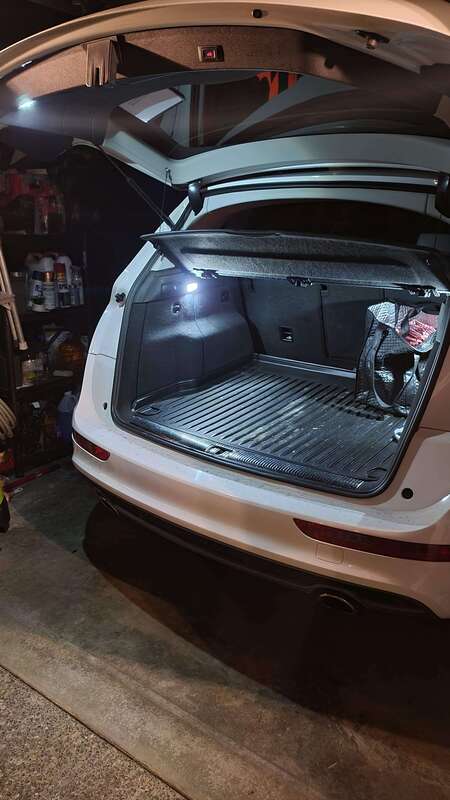
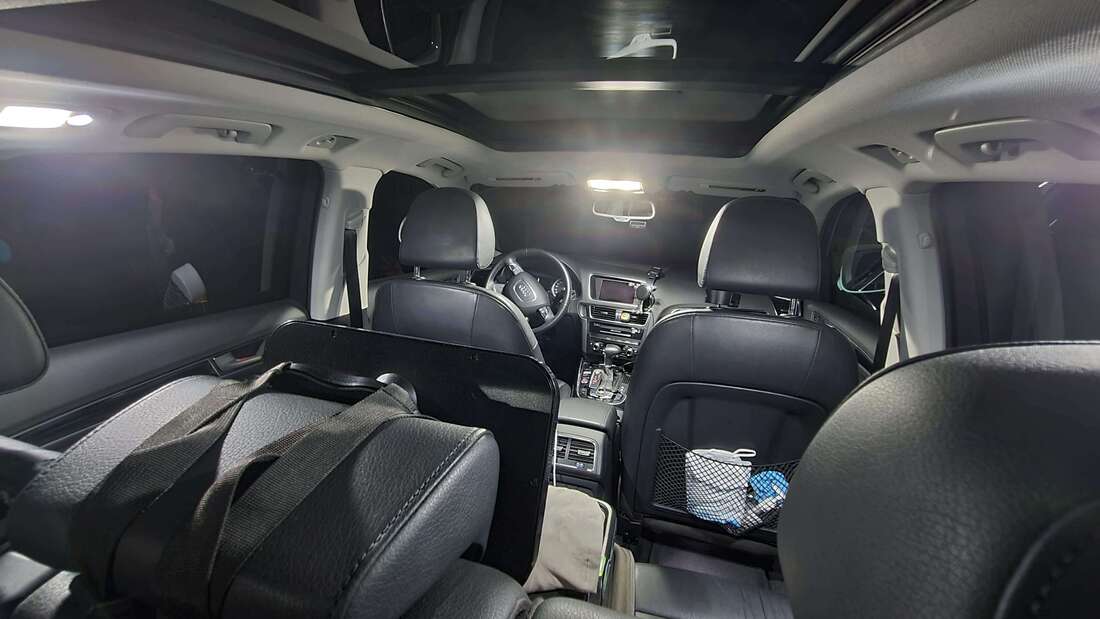
First off, we have been running the EPL Stage 1 and TCU tune for the past few weeks. We absolutely love it and the wife is already ready to go dual pulley asap. I think I would rather go the route of a oversized 200mm+ crank pulley rather than, messing with the supercharger pulley. We will see about that. Likely a summer project. Next, we have a new 034 Motorsport intake pipe to allow more supercharger whine. While the sound is great, I was not happy with the fitment of the intake pipe. I wish ECS offered a Carbon fiber intake like they do with the S4.... The new aFe 11-10121 (affiliate link) air filter is on order. The OEM filter was pretty bad and needs to go. For lighting we got 3000k yellow HIDs installed in the fog lamps which is a must in our rainy Pacific Northwest weather. Also soon there will be some new 5000k Morimoto D3s bulbs going into the headlamps. Looks like the previous owner did not replace the bulb in pairs so they are mismatching in colors. And lastly, I did a LED conversion for all the interior lights. FYI, the list below is the location, number of bulbs needed, and type of bulb.
Below is the bulbs I used, base off being the brightest and best reviews. Obviously you can use what works best for you, this is just what I picked....
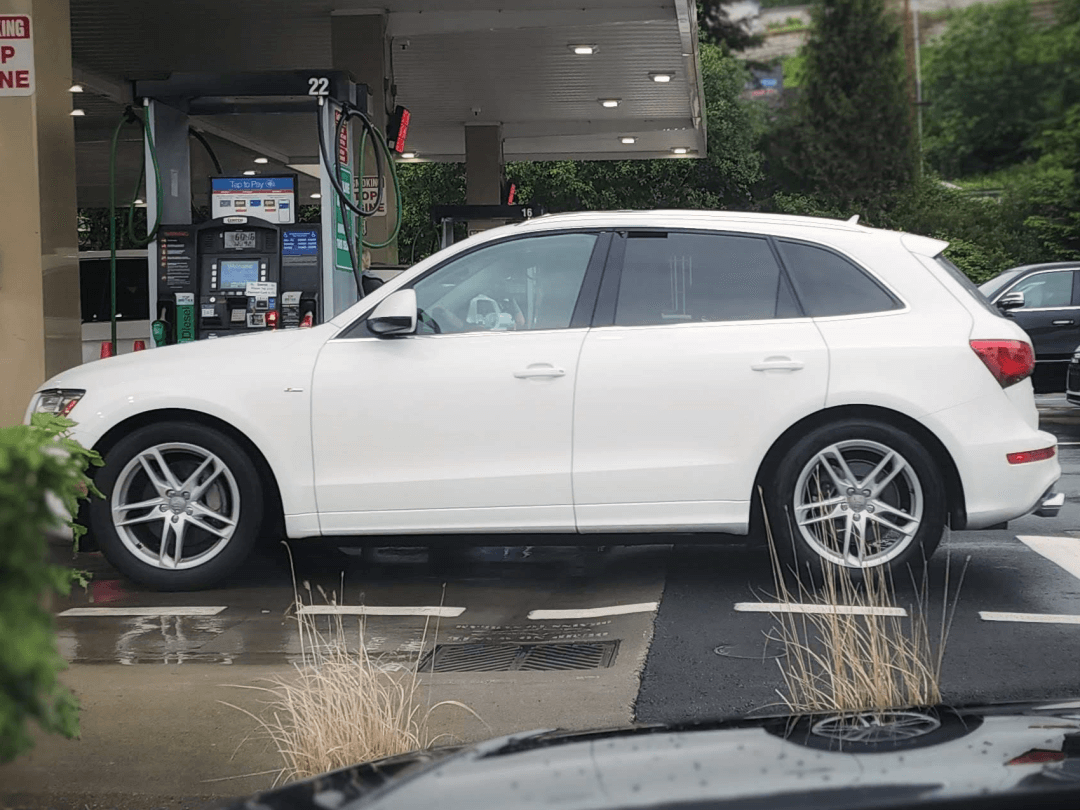
Finally got the wife the Audi she so deserves! It's a little up there in miles with 113k, but I know the 3.0t is a great engine so it's nothing I worried about. Came with some new Michelin tires and almost perfect condition wheels. This was a one owner car and they had all the work down at Audi of Seattle. Luckily the CarFax shows the thermostat and water pump were replace last year so that is one less thing to worry about. Zero sun roof rattle, which is near unheard of for the Q5 and SQ5! I do have to say I'm loving this zf transmission. Even with the stock de-tuned setup the car still very quick and responsive. The future plans....
Honestly don't think this car will go past a Stage 2 single pulley tune, but still will be a fun family car.  Just got back from the drive and it was pretty good. With a pretty full car now, I think I'm done driving highway 2. The road has so many huge dips my bump stops likely look like foam washers. Honestly I like the driving more, so going I-90 would be a little more fun. As for Leavenworth there was for sure a good group, not the biggest gathering in years past, but still a good turn out. There was far more Audi's there then I've seen in a long time which was pretty cool. What I thought was a little odd was the complete lack of police to make their presence know. People were getting a little crazy with their pop and bang tunes, and launching their cars on the main street. There is a place to have a little fun, but with so many kids and young families, this was not the place. Luckily my 2 month old slept threw it, but I shouldn't need to bring ear protection for a event like this. I know I'm getting old and I love a good sounding exhaust just like anyone else, but I love this drive more and as a community I think we need to be on better behavior or risk having no drive. Ok dad rant done.... Anyways it was fun would still recommend it for anyone that hasn't gone in years past. And yes, I made another video like years past (see below). The sky was so clear and clean, the lighting was just epic. I need to invest in a better gimbal... one that doesn't die after a hour of use.... sorry the last half of the video being a little bumpy. Enjoy! The Leavenworth Drive has been announced for June 19th 2021, see official details here. We are going to do our pre-meet in Monroe, WA like years past. If you would like to join, please view my Facebook event:  With covid crap going on I just wasn't putting many miles on the car to allow all the new exhaust components to break-in, so at this point I'm calling it long enough and here is the video everyone has been asking about. Again, the setup is:
Winter is gone and time to get the smoked peelers back on, but this time with all new Micheline Pilot Sport All Season 4. My previous Pirelli tires were cracking and the tread was separating in places... they were pretty nasty looking. They came with the car when I bought it and it was time to ditch them. Not to mention the wife and I just had our second child, so it was time to get something that was far superior and more importantly safer. This new Michelin tires are pretty new and all the reviews I read were extremely positive and some people felt they were just as good as a true summer tire. With the baby in the back I haven't been able to fully test them out, but I will say the ride harshness is way down (but still solid feeling) and the road noise is vastly reduced. That all said, you really can't go wrong with Michelin tires these days. Other than that looking forward to the Leavenworth Drive coming up. Hope all you can join and don't forget to get your Covid Vax! I just got the Vibrant Ultra Quiet (affiliate link) resonators installed today and the rasp and snappy-ness is gone! The overall volume of the exhaust is quieter for sure, but the tone is so much smoother. The volume is closer to what it was before I had catted down pipes installed. That said, I know that the tone and volume is likely going to change over the next few weeks so as long as the rasp stays away, I'm good with it getting louder. As a reminder, my current setup is test pipes, to catted down pipes, to the Magnaflow 11385 xpipe (affiliate link) , to the new Vibrant Ultra Quiet (affiliate link) resonators (in place of where the stock mid-muffler was), and finally the stock rear mufflers. And below we got a pretty crappy sound clip. This is after a 25mins drive from the exhaust shop to my house. With the rain and my hvac running, there is just a lot of background noise (sorry). - Amazon affiliate links were used in this post Next Wednesday (3/24) I'm getting two 2.25in Vibrant Ultra Quiet (affiliate link) resonators installed where the stock mid-muffler used to be. It is going to be a tight fit, but the hope is that this will dial back the rasp I get at moderate to full throttle. Honestly when the exhaust is warm the rasp really isn't that bad... kind of has a exotic sound to it, but when the exhaust is cold, it is just bad. That all said, the current setup has almost no drone, which I believe is thanks to the front Magnaflow 11385 xpipe (affiliate link) and the rear stock mufflers. Another video to come once this is completed. - Amazon affiliate links were used in this post 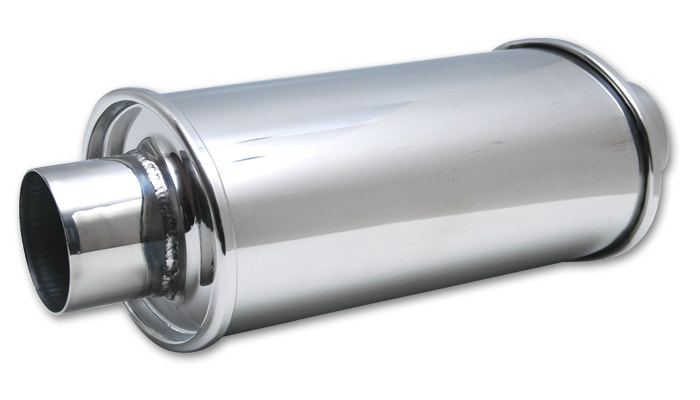 Update: Oddly I took the J shaped Vibrant O2 spacers off and used some straight spacers that were given to me with the test pipe. Since using them, no check engine light. No need to switch tunes, now.
With the new custom test pipes and catted down pipes, the O2 spacers I got just aren't cutting it. I got some different kind O2 spacers on order, but I fear I'm always going to have issues with the Check Engine Light (CEL). Sadly my current tune with EPL doesn't offer a "test pipe" tune. I really do love the burble and soft crackle you get with the new adjustable tune they just released. While they have been nothing but super helpful, I feel like my options are limited here. Honestly, I could just go cheap and put a sticker over the CEL and call it good, but then I can't visually know when there is another problem. This also applies when the CEL is always on, unless you go check for errors you don't know when faults start adding up. The 3.0l is a pretty reliable engine so it's not like 2.7t where you might have a CEL on so much that it burns out the cluster bulb. I typically scan for errors once a month via my OBDeleven, but I really like to keep my car running as problem free as possible. That all said, I know the current battle on the B8 S4 platform has been IE vs 034, but as of lately I've heard more good things from from 034 customers than IE. Also I've really enjoyed the transparency and info 034 offers on their Youtube channel: https://www.youtube.com/user/034motorsport/videos I'm going to reach out to them to make sure they offer a "test pipe" tune, and hopefully in the coming months make this CEL go away. If you run 034, please comment on your thoughts. Thanks all! Today is the day I get my S4 back. Michael at Apex Performance and Fabrication (also found on Facebook here) just sent me these pictures last night.... and all I can say is WOW, just amazing work. If you live in the PNW and need exhaust or other fabrication (they do lots of stuff) I certainly recommend this place.
- Amazon affiliate links were used in this post | ArchivesNovember 2022 CategoriesAll |


 RSS Feed